|
Copy and Photography by Jim Batie
Introduction
Have interior upgrades in traditional magazines left you wondering
how a novice could possibly accomplish such a project? Instead
of making suggestions or simply showing you how one interior
element or another might add a certain look, in this article
FordMuscle is going to perform a "real-world" door
panel upgrade. And yes, when we say "real-world"
we're talking about using junkyard parts.
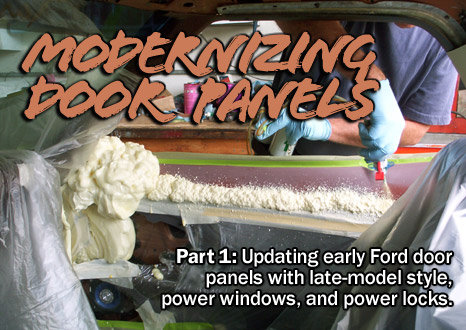
In a two-part series, we'll demonstrate how we added a modern
appeal to a vintage Ford's door panels. The model of our early
Ford is not critical and if you decide to undertake a similar
project, neither is yours. The critical step is to find a
donor vehicle whose door panels can, with some fabrication,
accommodate the design of your project car's doors. In our
case, we modernized the door panels in a 1972 Ranchero with
door panels from a 1995 Thunderbird. Our specific project
also required the inclusion of power windows and power locks,
an additional challenge FordMuscle was proud to document.
Before Getting Started
We cannot overstate the importance
of planning ahead before embarking on a custom interior upgrade.
Before acquiring the 1995 Thunderbird door panels, we spent
hours measuring and re-measuring our Ranchero's door dimensions
as well as the door panel dimensions of potential donor vehicles.
Over the course of a week or more we
made several trips to the wrecking yard and back to the shop
while planning and looking for complications. Here's what
we did...
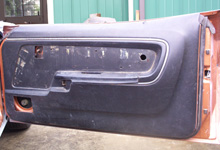
 This is the original panel on our 1972 Ranchero. The mid-70's
two-door originally came with a standard or a sport door
panel. The sport door panels were already a nice design,
but we wanted something different.
This is the original panel on our 1972 Ranchero. The mid-70's
two-door originally came with a standard or a sport door
panel. The sport door panels were already a nice design,
but we wanted something different. |
|
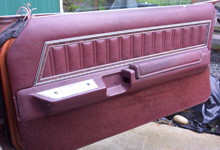
 Initially, these panels from a 1979 Thunderbird appeared
perfect since they included switches for power accessories
and a provision for mounting a driver side remote mirror
control. Unfortunately, they were uncomfortable and not
quite appealing enough for the undertaking.
Initially, these panels from a 1979 Thunderbird appeared
perfect since they included switches for power accessories
and a provision for mounting a driver side remote mirror
control. Unfortunately, they were uncomfortable and not
quite appealing enough for the undertaking. |
| |
|
|
|
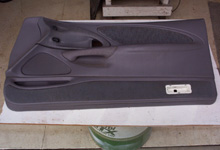
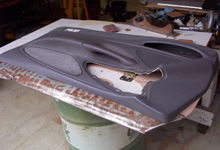
 This pair of 1995 Thunderbird panels offered a dramatic
update in style that would make the conversion well
worth the effort. These panels offered an armrest that
flows into a smooth door-pull, a nicely molded panel
housing the switches, and a contoured area at the front
for extra knee room. It was obvious that these panels
would require a lot of work to adapt.
This pair of 1995 Thunderbird panels offered a dramatic
update in style that would make the conversion well
worth the effort. These panels offered an armrest that
flows into a smooth door-pull, a nicely molded panel
housing the switches, and a contoured area at the front
for extra knee room. It was obvious that these panels
would require a lot of work to adapt.
|
|
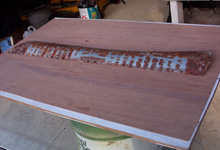
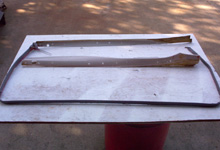
 We needed to create a base for the new panel to attach.
We chose a 1/8" thick piece of Luann (that's the
stuff that looks like plywood). Using the OEM door panel
shown in caption one, we simply placed it on the Luann
and marked its outline with a black marker. By cutting
the board with a saber saw we now had a lower section
ready to use. We used the upper section of a standard
Gran Torino door panel (the stamped metal rusty piece)
to accommodate the curve on the top of the door.
We needed to create a base for the new panel to attach.
We chose a 1/8" thick piece of Luann (that's the
stuff that looks like plywood). Using the OEM door panel
shown in caption one, we simply placed it on the Luann
and marked its outline with a black marker. By cutting
the board with a saber saw we now had a lower section
ready to use. We used the upper section of a standard
Gran Torino door panel (the stamped metal rusty piece)
to accommodate the curve on the top of the door. |
| |
|
|
|
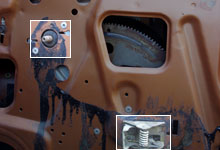
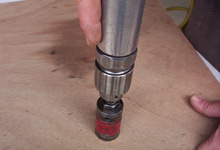
 Before we could begin trial fitment of the Luann, it
was necessary to remove the manually operated window
regulator and its protruding window crankshaft. Additionally,
we had to remove the stock mechanism for the inside
door release handle.
Before we could begin trial fitment of the Luann, it
was necessary to remove the manually operated window
regulator and its protruding window crankshaft. Additionally,
we had to remove the stock mechanism for the inside
door release handle.
|
|
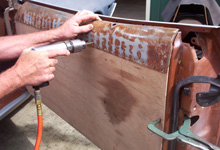
 Now that the inner door was free from obstructions, it
was time to attach the stamped donor sheet metal to the
Luann base. The lower section was clamped to the door
in its proper position. The sheet metal piece was then
installed in its correct position and the two were attached
to each other with several pop rivets.
Now that the inner door was free from obstructions, it
was time to attach the stamped donor sheet metal to the
Luann base. The lower section was clamped to the door
in its proper position. The sheet metal piece was then
installed in its correct position and the two were attached
to each other with several pop rivets. |
 Several of the access holes in the inner door frame were
traced to the inside of the Luann board. Once removed,
the access holes were rough-cut and traced to the board
for the other door panel.
Several of the access holes in the inner door frame were
traced to the inside of the Luann board. Once removed,
the access holes were rough-cut and traced to the board
for the other door panel. |
|
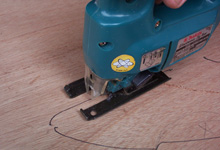
 In addition to a sabre saw, we used a hole saw and grinder
to resize and enlarge the access holes several times as
the project continued. We eventually eliminated most of
the center of the Luann backing panel.
In addition to a sabre saw, we used a hole saw and grinder
to resize and enlarge the access holes several times as
the project continued. We eventually eliminated most of
the center of the Luann backing panel. |
| |
|
|

 Later model Fords use a stepped edge around the outer
perimeter of the door, where the panels mount. As a result,
the donor panels have extra depth to them when compared
to early Ford panels. The excess that was designed to
fit over the step in the Thunderbird door frame was trimmed
to allow the panel to mount flush to the new backing panel.
Later model Fords use a stepped edge around the outer
perimeter of the door, where the panels mount. As a result,
the donor panels have extra depth to them when compared
to early Ford panels. The excess that was designed to
fit over the step in the Thunderbird door frame was trimmed
to allow the panel to mount flush to the new backing panel.
|
|
 Here is the excess we removed. Trimming the door panel
was also necessary to provide adequate space between the
seat and the door panel. Small
holes were drilled as a means to mark from the inside
of the door panel flush with the inner surface. These
holes were then connected with a marker and a straight
edge. The material was trimmed off to the high side, allowing
for fitment.
Here is the excess we removed. Trimming the door panel
was also necessary to provide adequate space between the
seat and the door panel. Small
holes were drilled as a means to mark from the inside
of the door panel flush with the inner surface. These
holes were then connected with a marker and a straight
edge. The material was trimmed off to the high side, allowing
for fitment. |
| |
|
|
 We were now ready to temporarily
attach the Thunderbird panel to our fabricated backing
panel. This was done using several screws and rivets.
We were now ready to temporarily
attach the Thunderbird panel to our fabricated backing
panel. This was done using several screws and rivets.
We used existing holes and located others where they would
be hidden or covered. |
|

 Once properly fitted to the door,
the panels were temporarily attached using two sheet metal
screws. We could now attempt to close the door and see
just how much trimming would be needed to allow the new
panel to fit against the dash. Unfortunately, the door
would barely close half way.
Once properly fitted to the door,
the panels were temporarily attached using two sheet metal
screws. We could now attempt to close the door and see
just how much trimming would be needed to allow the new
panel to fit against the dash. Unfortunately, the door
would barely close half way. |
|


