|
Back From the
Machine Shop and Initial Procedures
After numerous calculations and drop-ins at the machine
shop, the 400 block and crankshaft are both in our hands once
again and the combo is ready for pre-assembly. Here's how
we got started.
 Installing Expansion and Oil Galley Plugs

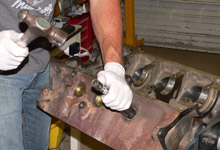
 We started off by unloading the block and setting it gently
on the garage floor.
We started off by unloading the block and setting it gently
on the garage floor. |
|

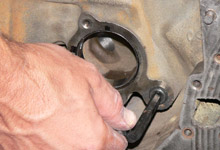
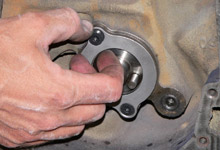
 No engine stand yet, we needed to install the rear cam
retainer since the back of the block would be inaccessible
once on the stand.
No engine stand yet, we needed to install the rear cam
retainer since the back of the block would be inaccessible
once on the stand. |
| |
|
|

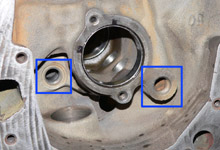
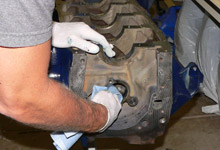
 Installing the rear oil galley plugs is not critical during
the mockup stage but while we had the expansion plug set
out, we screwed them in using a light amount of RTV. The
rear oil galley plugs are pipe threaded for a tight interference
fit.
Installing the rear oil galley plugs is not critical during
the mockup stage but while we had the expansion plug set
out, we screwed them in using a light amount of RTV. The
rear oil galley plugs are pipe threaded for a tight interference
fit. |
|
 With the block now on the engine stand we installed the
six expansion plugs, also with some RTV.
With the block now on the engine stand we installed the
six expansion plugs, also with some RTV. |
| |
|
|
 For the sake of consistency, we installed the front oil
galley plugs.
For the sake of consistency, we installed the front oil
galley plugs. |
|
 These plugs are adjacent to the front cam bore and are
not pipe threaded like the rear plugs. We screwed them
in firmly with RTV.
These plugs are adjacent to the front cam bore and are
not pipe threaded like the rear plugs. We screwed them
in firmly with RTV. |
| |
|
|
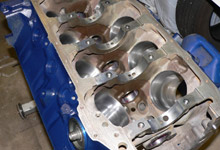
 At this point we chased the main cap bolt holes with a
tap. The same was done to the cylinder head bolt holes.
Subsequently, the block was cleaned using compressed air,
brake cleaner, and lint-free wipes.
At this point we chased the main cap bolt holes with a
tap. The same was done to the cylinder head bolt holes.
Subsequently, the block was cleaned using compressed air,
brake cleaner, and lint-free wipes. |
|
|
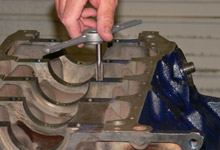
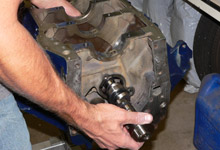
Installing Camshaft
With full access to the 5 cam bores, now was a good time to
install the camshaft even though we wouldn't be degreeing
the cam and checking piston-to-valve clearance until other
critical measurements were taken.
Special attention was paid to the cam bearings, being
sure they were wiped free of any dust and small particles. |
|
Each cam bearing was coated with Comp
Cams Pro Cam Lube. |
| |
|
|
The cam was carefully threaded through each cam bore while
being sure not to gouge a cam bearing. |
|
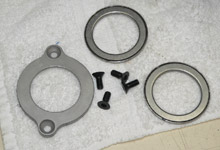
We chose to use this Comp Cams Thrust
Bearing Cam Retainer Plate instead of the factory
plate. The assembly does require special machining of
the cam sprocket for use. |
| |
|
|
Next, we secured the cam by installing the retainer. Finger
tight is OK. Remember, we'll be going back through these
areas during final assembly. |
|

With the cam installed, we rotated it by hand at the dowel
pin in order the coat the lobes with the same Comp
Cams Pro Cam Lube used in Step 2 above. |
| |
|
|

Of course, pre-assembly wasn't completed in just one evening.
Therefore, it's a good idea to keep your motor covered
when time expires, especially with assembly lubricants
acting as fly traps for dust. |
|
|
 (Pre-Installing
Crankshaft and Checking Main Bearing Clearance) (Pre-Installing
Crankshaft and Checking Main Bearing Clearance)
|