| Carpet Installation (cont.) |
13. The pre-moulded carpet comes
folded up in a box. It's a good idea to lay it out for a day
so that the rubber takes its original shape. We actually spread
it out on the warm hood and in a couple hours it was pretty
flexible and ready to go.
Note also that many of the common holes (seatbelts, shifter,
seat bolts) are precut. However many are not, so have some new
razor blades on hand. |

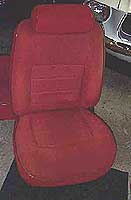
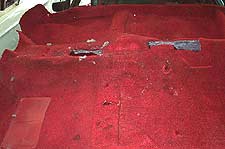
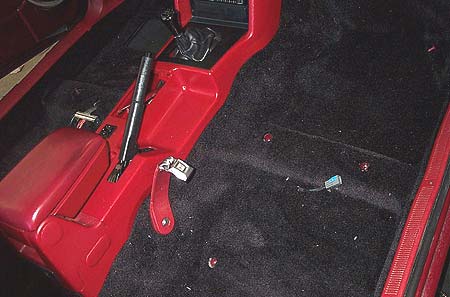
14. Here's what we were starting
with, a bone stock '88 interior. The sea of red will be replaced
with a sporty combination of black carpet and seats to contrast
nicely with the red and black dash and console pieces. |
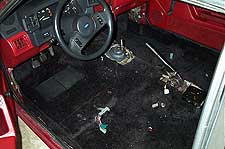
15. We're going to fast forward
beyond the individual steps required to remove the old carpet
so we can focus on the installation. Needless to say, the seats,
center console, and kick panel trim must be remove to pull the
old carpet out. |
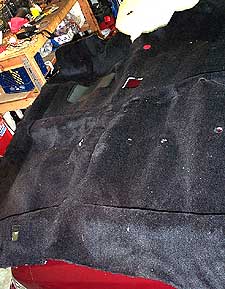
16. The new carpet requires that
you cut some holes to match your shifter (auto or trans) and
miscellaneous other items. The best way to cut the holes is
to lay the old rug on top of the new, and then use a razor blade
to trim it. |
17. The new carpet is then laid
down inside the car. We found the easiest way to get the rug
in is to fold it in half and feed it in through the hatch, with
the rear seats folded down. Force the rug as far forward as
possible until the precut holes for the shifter and e-brake
are lined up. |

18. The ACC carpet comes with
a rubber-laytex backing, and a thin felt pad. We felt no need
to transfer any of the stock underlay over. |
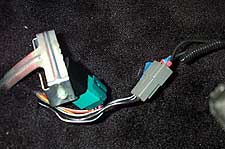
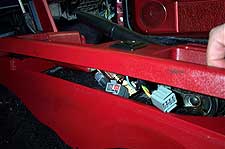
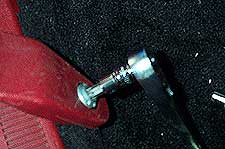
19. We had to cut a slot in
the carpet area under the drivers seat to bring the power
seat harness and fuel pump relay through. Note the two wires
connected to the plug -that will power the new '94 GT seats.
More later.
|
|
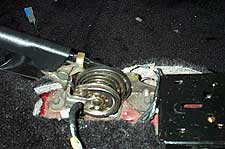
20. Additional trimming is necessary
around the parking brake and rear console bracket.
|
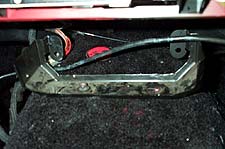
21. Two slits needs to cut into
the carpet to allow the two studs for the front console/dash
bracket to protrude through. Feel for the studs, then use
a new razor blade and cut an "X" directly over the
stud.
|
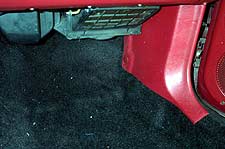
22. The premolded carpet is really
hassle-free. It sits nice and tight on the floor, and the trim
pieces, like the kick panel, all go back into place without
and bulging or interference. |
23. The console halves are laid
into place. Before securing the top half, make sure the lighter
and power mirror harnesses are connected.
|
|

24. The armrest is secured to
the rear console bracket.
|
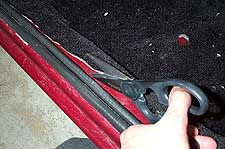
25. Trim off the excess carpet
at the door edges, this will ensure the door trim panel will
fit without bulging or snagging the carpet. |
|
26. The lower trim piece and
seat belts are reattached.
|
27. With all the console and trim
pieces back in position, we ran a vacuum over the carpet to
pick up any loose stuff before the seats go in. |
| |
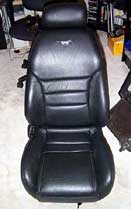
28. The most exciting upgrade
would be the installation of these '94 GT seats. They
bolt right in to place, and the driver side is power operated.
Both sides have a power lumbar bladder.
Installation is drop in, no need to modify the brackets
or mounting holes. However to get the power to work we
had to simply make a two-wire jumper with spade connectors,
from the connector under the seat to the one in the car.
The two connectors won't connect directly.
|
|
| |
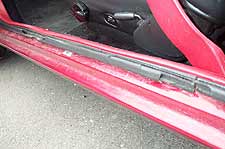
30. Our seals had major torn areas
near the bottom, where you shoes scrape getting in and out.
The rubber has also lost its compression ability, and thus allowed
water to seep in from the top of the door. |
31. The seals are simply pinched
on the body panel joint. However to get the old one out and
the new on on, you'll need to remove the lower sill plate and
kick panel, the dash speaker grill and A pillar trim, the then
gently pry back the headliner trim piece. It's not as bad as
it sounds! |

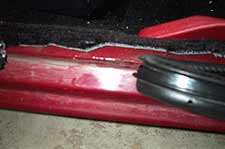
32. Start the new seal near the
bottom center of the door. The seal has a metal wire "U"
channel, which slips over the body joint. Give it a firm pinch
to ensure its locked on for good. When you get all the way around,
go back and make sure it is seated properly and evenly. Then
trim the excess to leave a 1/8" gap. |

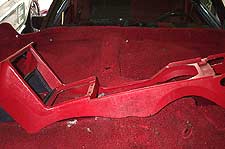
33. Here's the final product,
an interior that looks much more appealing with nicely contrasting
black carpet and red trim. It's a wonder why the designers at
Ford couldn't have come up with this! The seats offer great
support under hard driving. |
Sources:
ACC (Auto Custom Carpets) Inc.
http://www.accmats.com
1-800-352-8216
|