| Assembly |
|
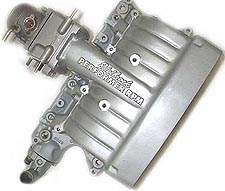
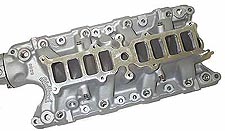
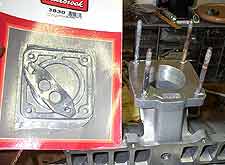
25.
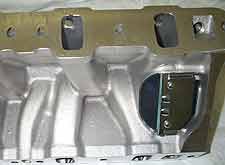
The underside of the Edelbrock Performer/Performer
RPM lower intake reveals how straight the runners
are, almost providing a tunnel ram effect into the
combustion chamber.
Before the intake can be installed you must attach
the supplied PCV baffle using the self tapping screws
provided. |
26.
We're using Fel Pro 1250 "Printoseal"
intake gaskets -pretty much the standard when mating
aluminum intakes to aluminum heads. We use a bead
of RTV silicone around the waterports only. |

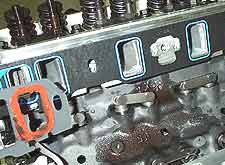
27.
We goofed here.... because we typically work on
carbureted engines we've been in the habit of blocking
off the EGR passage in the head, using the shown
block-off piece that Fel Pro supplies with their
intake gaskets. On an EFI car this will trip an
EGR code due to a lack of exhaust gas passing through
the intake. More on this in the next issue. |
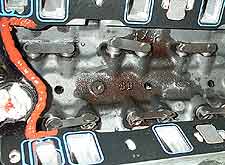
28.
Anyone who has experience with small block Fords
will tell you to discard the cork end-seals that
come with all intake gasket sets. They tend to leak
and prevent the intake from sealing properly. The
proper way to seal the intake is to lay a 1/4"
thick bead of silicone sealer on the front and rear
seal rails as shown. |
29.
Let the silicone set for a couple minutes, then
carefully lay the lower EFI intake down on the block,
and install the intake bolts finger tight. You'll
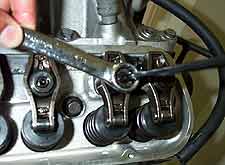
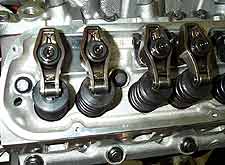
see the bead of silicone at the front and rear of
the block compress and form a perfect seal between
the intake and block. |

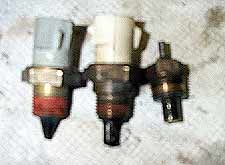
30.
Torque the lower intake in a criss-cross pattern,
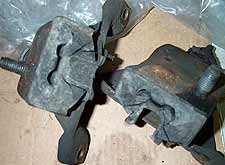
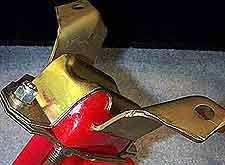
starting from the innermost bolts and working outward.
Torque in two steps to a final reading of 18-20
lb.ft. It is critical not to over torque an intake
manifold, especially when attached to an aluminum
head, as it is easy to warp one of both pieces.
|
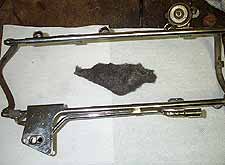
31.
One of the things we picked up from the wrecking
yard was a spare fuel injector rail. This would
allow us to assemble the injectors beforehand, rather
than pulling the dirty one off our old motor and
dealing with gas spilling over the new intake. We
used some steel wool to polish the chrome plated
rails. |
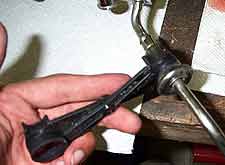
32.
By the way, you'll need a fuel/AC line disconnect
tool, such as the one shown. They are under $10,
and just about the only way you'll separate the
spring-lock coupling on the Ford EFI hard lines.
Simply select the correct size and slide the tapered
end into the coupling. It will spread the spring
apart between the lines, allowing the lines to be
pulled apart with a firm tug. |
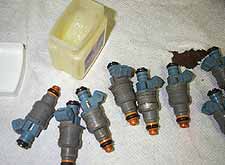
33.
We decided to upgrade to 24 lb. per hour fuel injectors
to meet the demands of our new induction system.
We obtained the FRPP injectors in good used condition
for about $100. (The are about $250 new.) Whenever
buying new injectors it is a good idea to check
and replace any cracked o-rings and pintle caps
- the orange cap at the end of the injector. Never
install injectors dry, use a little petroleum jelly
to lube the o-rings. |
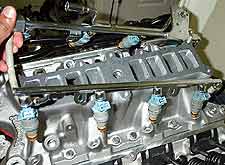
34.
The injectors are first installed in the rail, then
the assembly is placed on the lower intake. Be sure
each injector is fully seated in its boss before
securing the rail to the intake. |
35.
With the lower intake completed, we finished up
the valve train by installing new pushrods. Since
we are using guideplates we needed to buy hardened
pushrods in the stock length. Stock pushrods are
not hardened and will wear out against the pushrod
guideplates. |
36.
We're using a set of Comp Cams 1.6:1 roller tips
rockers. While they are not a full roller rocker,
they are a considerable improvement over stock in
that they reduce friction across the valve stem,
and they offer a true 1.6:1 ratio. |
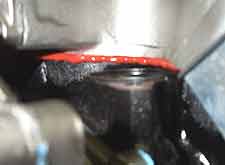
37.
We installed a stock replacement waterpump. Many
people seem to have trouble with leaking waterpump
gaskets. Using a little bead of RTV to affix the
gasket to the timing cover, and also around the
water passages, will ensure a leak free seal. |
38.
We took a close look at our critical sensors that
attach to the lower intake manifold. From left to
right are the ECT (engine coolant temperature),
IAT (intake air temperature), and also the sending
unit for the engine temperature gauge. They all
tested out within specification so we did not replace
them. |
39.
To feed
the better breathing engine we picked up a used
FMS 65mm throttle body and spacer for $120. We had
to purchase the gaskets separately from Edelbrock.
We transferred the mounting studs over from the
old intake. |
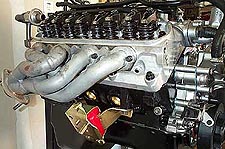
40. We
finished off the motor with a set of shorty headers
and Energy Suspension polyurethane mounts (see side
bar.) In the next part of this series we'll
remove the old motor, transfer a few parts over,
and then drop our new 5.0L into the engine bay of
our '88 LX. We'll also take the car to the track
for some preliminary ET's, as well as to the smog
test station.  |
| |
|
|
|
|
|
|