|
 |
 |
| 1.
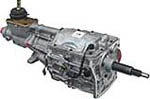
Removing the AOD is simply a matter of disconnecting everything
that's attached to it. Be sure to remove the four converter bolts
or nuts. Wedge a screwdriver between one of the slots in the flywheel
and the block plate to keep the converter from turning as you loosen
the bolts. |
2.
When all the cables and fluid lines are disconnected and the bellhousing
bolts are removed, the AOD can be lowered down. It's heavy, so keep
it level! |
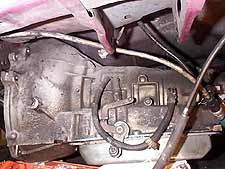
3.
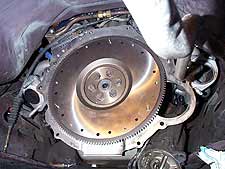
With the AOD out of the way, remove the flexplate and blockplate.
We'll reuse the flexplate bolts for the manual flywheel. |
 |
 |
 |
|
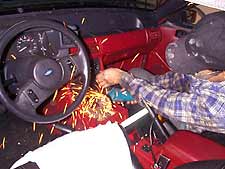
4.
No job is complete without using the trusty 4" grinder at
least once!
We found that the lower AOD shift plate would not fit through
the shifter opening. Since we weren't in the mood to spend and
hour removing entire console, we simply cut the bracket so it
could be bent and pulled out.
|
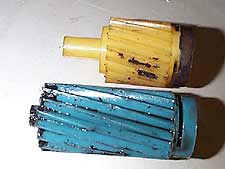
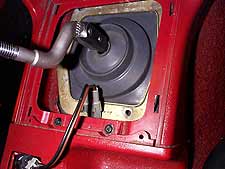
5.
Here is the AOD shifter assembly that gave us trouble. The two halves
were actually riveted together, so we had to drill the rivets out.
The top half came right out, but the throttle cable bracket on the
lower half made it impossible to remove. We cut the plate (arrow),
which allowed us to bend it an yank it out. The plate can still
be used with a little tack welding. |
6.
Be sure to install the pilot bearing! A little moly on the outside
and a socket and hammer is all that is needed to tap it into place.
Now is also a good time to replace the rear main seal for good measure. |
 |
 |
 |
| 7.
The T5 dustplate goes on followed by the flywheel. We had the stock
flywheel machined beforehand. Be sure to install the pressure plate
locating dowels! We reused the AOD flywheel bolts. Use a dab of
RTV on each and torque to 90 lb.ft. The clutch goes on next . Torque
the pressure plate bolts to 25 lb.ft. |
8.
Install the new throwout bearing on the clutch fork, then bolt the
bellhousing to the block. You'll need a few new bellhousing bolts,
as some of the AOD bolts are too long and bottom out in the block.
Take an AOD bolt to the hardware store and get four new grade 5
or 8 bolts, one-inch shorter. |
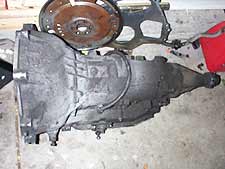
9.
The T5 is finally bolted to the bellhousing.( Be sure to have the
correct metric T5 to bellhousing bolts beforehand! ) Your existing
AOD crossmember and mount will work.
|
 |
 |
 |
| 10.
The T5 uses a shorter speedometer gear, available from Ford. Don't
order the same tooth count however! Use this
site to determine which gear you need. |
11.
There are two electrical connection to make on the T5. This harness
contains the reverse lights and the neutral safety switch. The left
end connects to the terminals on the T5 case, the other end connects
to the harness hanging under the car -the same one the AOD connected
too. |
12.
This harness that hangs off all T5 cases won't be used. On factory
T5 cars it connects to a harness exiting under the floor pan, however
this entire harness and circuit is not found on AOD cars. As we
mentioned earlier, without this harness in place you cannot use
the self test features when using a T5 processor. |
 |
 |
 |
| 13.
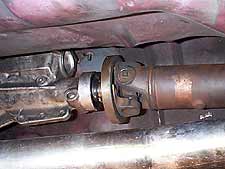
Reinstall the driveshaft. Use Loctite red on the driveshaft bolts
and torque to 90 lb.ft. Reinstall the starter, and fill the case
with 2.5 quarts ATF. |
14.
We recommend using the stock rubber insulator, as it keeps noise
and fumes out of the car.Only the two of the four holes line up,
which was fine with us. You could drill the tunnel to attach the
other two screws.
Note the AOD shift position light harness - disconnect it. |
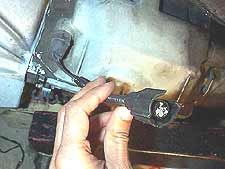
15.
Last but not least, attach the end of the cable to the clutch fork.
Don't forget the retaining clip (arrow). There is also a cover (not
shown) that seals up the fork and opening from moisture and dirt,
you can see the black RTV outline for where it goes. Both are available
from Ford if you don't find them used. |
|
|
Sources:
SPEC
(Start Performance Engineered Clutches)
3420 Davey Allison Blvd.
Hueytown, AL 35023
ph. 800-828-4379
Fortes
Performance Parts
474 Moody St.
Waltham, MA 02453
ph. 781-647-1530
http://www.fortesparts.com/
|