Replacing
a converter is not difficult, but requires dropping the AOD. If you've
got access to a lift its obviously much easier. Otherwise jack the car
as high as possible and support it on jackstands at the front and rear.
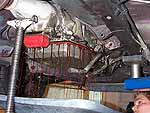
Start by removing the h-pipe. Then support the tail of the transmission
with a jack stand and remove the cross member. Before removing the driveshaft,
its
a good idea to drain the pan and replace the filter and gasket before
continuing. This prevents a huge mess and saves some weight when you
start to lower the transmission.
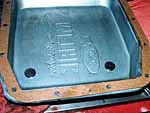
Check
the pan and fluid for signs of a failing transmission. If you find dirty
fluid, metal shavings, or bits of plastic, you should consider a rebuild.
The increased torque and heat of the converter will quickly find any
weaknesses in the transmission. Otherwise, clean the pan and slap on
a new gasket and filter. Mike threw in some small magnets to catch any
metal shavings.
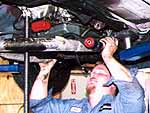
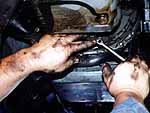
You'll need to disconnect the shifter, TV cable and bracket, speedo
cable, and wiring harness. Use flare wrenches to disconnect the cooler
lines at the transmission.
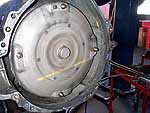
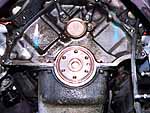
Remove the starter and inspection plate from the bell housing to access
the torque converter to flexplate nuts. You'll need to turn the flexplate
to access
all the nuts (use a socket on the harmonic balancer bolt.)
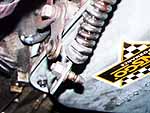
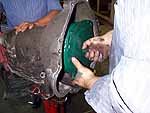
Finally
remove the six bellhousing to block bolts, and lower the transmission
down. You may need to jiggle it back and forth to get it to separate.
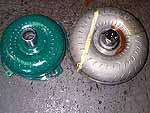
Be
sure to have a drain pan underneath the stock converter before you pull
it out as it contains several quarts of fluid.
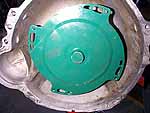
Before installing the new converter we replaced the front transmission
and rear main seals for good measure. Simply pry them out with a screwdriver,
and tap in a new one. Fill the new converter with a quart of fluid.
AOD's use a Dextron II/III rated ATF fluid, C6 and C4's use Type F.
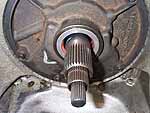
Installing the converter requires some technique. Rotate the converter
while pushing it forward, you feel and hear three clunks for each time
it engages a shaft (The
outer most shaft is the stator support, then the input shaft, and the
3-4 shaft.) The
3-4 shaft is usually the toughest to engage so be patient It MUST engage
all three shafts. If it doesn't you will blow the front pump in the
transmission the minute you fire up the motor...no joke.
After reinstalling the transmission and reconnecting all the cables,
lines and brackets, fill the transmission with three or four quarts
of fluid. Start the engine and let it idle. Check the fluid level
and fill to the mark on the dipstick. Check that all the gears are
functional and that there are no leaks before taking our for a road
test. It's also a good idea to install a transmission cooler in line
with the stock cooler in the radiator tank. High stall, non-lockup,
converters generate more heat which can accelerate wear on the transmission.
F/M
|
Sources:
Emerald Torque Converters
2040 North Main St. # 16
Walnut Creek, CA 94596
Phone: 925-934-8070
Fax: 925-945-0650
|
|