|
by Jon Mikelonis
If you've never heard of powder coating,
before reading any further do a google search and discover
the advantages of the youngest surface finishing technique
in use today. Once you are convinced that a more
durable and scratch resistant finish is what you desire, this
step-by-step article will show you how you can get started
powder coating in your own
garage.
Powder coating eliminates the use of
the "liquid carrier" that is used in normal aerosol
painting by applying paint electrostatically then baking or
curing the part in an oven. The powder or paint used in powder
coating is positively charged and essentially dusted onto
a negatively charged metal
part. Yes, powder coating only works only on metal material
such as steel, zinc, and aluminum. The result is a harder,
more abrasion resistant finish that is very tolerant of solvents,
greases, and oils. In my opinion, powder coating is cleaner
too since the entire process from prep to bolt-on is not as
long and does not require multiple coats. With powder coating,
"overspray" is 100% dry making it a snap to clean
up.
For the DIY auto enthusiast the greatest
value in powder coating is found
with parts that are both focal points and subject to a tough
environment.
While joe average doesn't consider what's under the hood a
focal point,
you and I do. And that's just about everybody in my book.
Combine the focal aspect of your motor compartment with the
fact that most underhood parts are exposed to high temperatures
and paint-eating fluids and there's no better place to get
started powder coating. Besides, if you're after the perfect
satin black finish that doesn't rob your ride of the dignity
it deserves, Eastwood's semi-gloss black powder will give
you exact results everytime. That is, if you prep your parts
using patience and
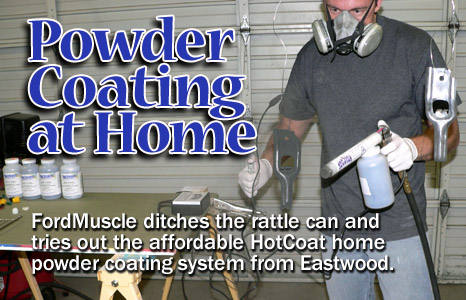
knowledge. Let me show you how it works. The Eastwood Company
has made it very simple

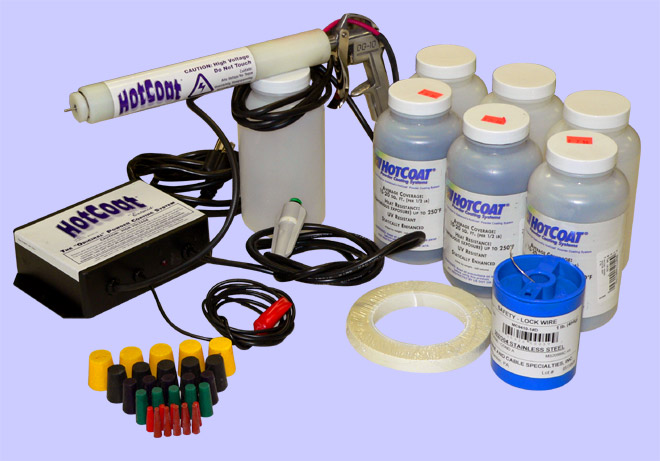
 Here's a shot showing the primary items required to get
started powder
Here's a shot showing the primary items required to get
started powder
coating. A powder coating gun kit, compressed air, some
good candidates for coating, and a dedicated parts oven.
Depending on the size of your parts, a toaster oven will
perform just fine.
|
|

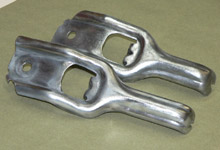
 For the purposes of this article I chose some spare radiator
tie downs
For the purposes of this article I chose some spare radiator
tie downs
that had been through my usual archaic restoration process
of strip,
rattle can, and premature installation. |
| |
|
|
|

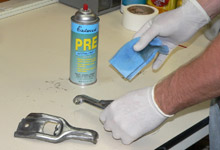
 Preparation of any part to be coated is critical. Even
more so with powder coating since a speck of paint,
dirt, or grease on the items you
Preparation of any part to be coated is critical. Even
more so with powder coating since a speck of paint,
dirt, or grease on the items you
intend to finish will prevent the powder from bonding
to the dirty area. Here I started with some Jasco to
remove old paint.
|
|
 What wouldn't come off with Jasco, I hit with a drill
and wire wheel. I
What wouldn't come off with Jasco, I hit with a drill
and wire wheel. I
was sure to thoroughly clean all the Jasco from the part
before I spun any
residual onto my bare forearms. That stuff burns. Whoooh. |
| |
|
|
 Once there were no visible signs of paint, grease, or
dirt, I wiped the
Once there were no visible signs of paint, grease, or
dirt, I wiped the
tie downs with Eastwood's "Pre". It's a solution
designed to lift off any
remaining contaminants that might prevent the dry powder
from bonding upon application. |
|
 This is how parts should look before you bust out the
gun.
This is how parts should look before you bust out the
gun. |
| |
|
|
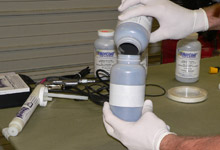
 The Eastwood HotCoat Deluxe Kit inlcudes some safety wire
for hanging
The Eastwood HotCoat Deluxe Kit inlcudes some safety wire
for hanging
parts.
|
|
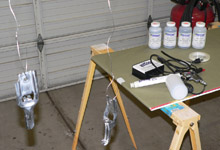
 I cut off a couple 3 foot segments and suspended the tie
downs from the
I cut off a couple 3 foot segments and suspended the tie
downs from the
rafters.
|
| |
|
|
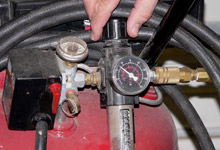
 Powder coating with this kit does not require a large
compressor or
Powder coating with this kit does not require a large
compressor or
high pressures. I dialed mine down to 8 psi to prepare
it for powdering. A
portable air tank or small compressor will work just fine.
The instructions say 5-8 psi is sufficient. |
|
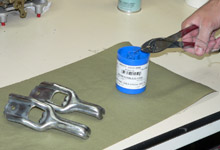
 The kit suggests filling one of the supplied containers
1/3 full with
The kit suggests filling one of the supplied containers
1/3 full with
powder to promote a good flow. |
|