To locate a modern yet musclecar-like seat
in some shade of brown, I researched craigslist
and found a pair of used Bestop Jeep seats. The brown was
not a perfect match, but the seats were comfortable and
inexpensive at $200 for the pair. Perhaps one day I could
have them recovered in "Ginger" to match the rear
seat and door panel inserts. At this point, just getting
them to attach safely to the floor was the next challenge.
|
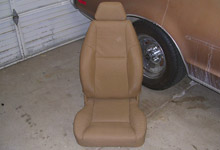
 Other than the adjustable headrest and larger bolsters,
these Bestop seats were similar in style to original
1972 Montego buckets. However, modern materials and
design make them much more comfortable.
Other than the adjustable headrest and larger bolsters,
these Bestop seats were similar in style to original
1972 Montego buckets. However, modern materials and
design make them much more comfortable.
|
|
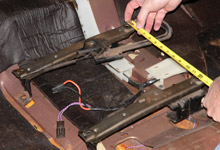
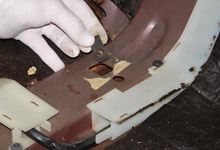
 I pulled the stock brackets from the bench seat removed
during teardown. The brackets used for bucket seats
and bench seats were the same. I set them in place and
took bolt hole center-to-center measurements for the
driver's side.
I pulled the stock brackets from the bench seat removed
during teardown. The brackets used for bucket seats
and bench seats were the same. I set them in place and
took bolt hole center-to-center measurements for the
driver's side. |
| |
|
|
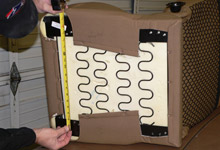
 Hoping for a miracle, I measured the center-to-center
distance between bolt holes on the Jeep seat bottoms
and looked for a match. No such luck.
Hoping for a miracle, I measured the center-to-center
distance between bolt holes on the Jeep seat bottoms
and looked for a match. No such luck. |
|
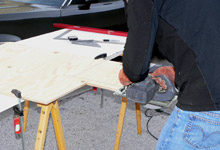
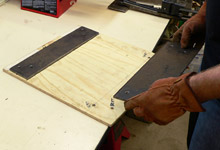
 They say there are 100 ways to skin a cat but I chose
to make a temporary adapter out of plywood to be used
both as a template and test piece. Since the final plate
steel adapters would need to be fabbed
up somewhere besides my garage, I wanted to eliminate
any potential for error.
They say there are 100 ways to skin a cat but I chose
to make a temporary adapter out of plywood to be used
both as a template and test piece. Since the final plate
steel adapters would need to be fabbed
up somewhere besides my garage, I wanted to eliminate
any potential for error. |
| |
|
|
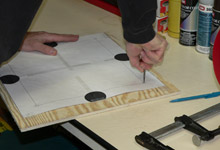
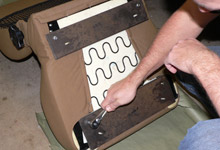
 I transferred the bolt hole pattern I measured from
the stock brackets (Step 2) to the piece of plywood
and drilled four holes.
I transferred the bolt hole pattern I measured from
the stock brackets (Step 2) to the piece of plywood
and drilled four holes. |
|

 Next, I positioned the plywood up against the seat bottom
to get a rough idea of fit.
Next, I positioned the plywood up against the seat bottom
to get a rough idea of fit. |
| |
|
|
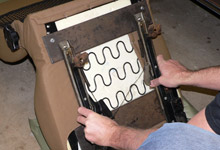
 By measuring the location of the bolt holes on the seat
bottom, I was able to identify where to drill the seat
attachment holes on the adapter
By measuring the location of the bolt holes on the seat
bottom, I was able to identify where to drill the seat
attachment holes on the adapter |
|
 Once all eight holes were drilled into the temporary
adapter, I attached the seat brackets with 4 bolts and
nuts.
Once all eight holes were drilled into the temporary
adapter, I attached the seat brackets with 4 bolts and
nuts. |
| |
|
|
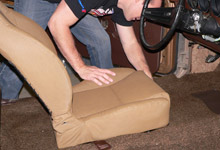
 I bolted the adapter to the seat bottom. The
seat was almost ready for a test fit.
I bolted the adapter to the seat bottom. The
seat was almost ready for a test fit. |
|
 Next, I added these heavy duty clips to the 2 inboard
bucket seat accomodations that were already in the floor
board. Remember, this Montego was an original bench
seat car.
Next, I added these heavy duty clips to the 2 inboard
bucket seat accomodations that were already in the floor
board. Remember, this Montego was an original bench
seat car. |
| |
|
|
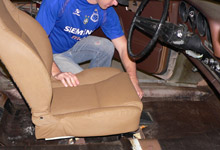
 Test fitting the seat proved my template was accurate.
 |
|
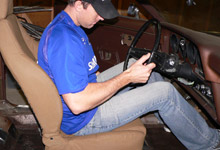
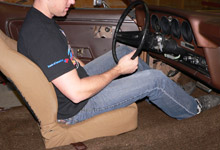
 By sitting in position and adjusting the seat forward
and back, I was convinced the travel was smooth and
perfect for a person of average height.
By sitting in position and adjusting the seat forward
and back, I was convinced the travel was smooth and
perfect for a person of average height. |
| |
|
|
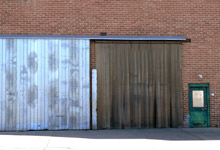
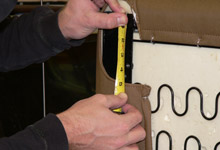
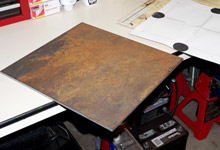
 Now it was time to find the steel I needed to make the
final adapters. I needed a 16" x 17-3/4" x
5/16" thick piece of mild plate steel. Here's the
machine shop I went to, not the most inviting place
but they did the job quick.
Now it was time to find the steel I needed to make the
final adapters. I needed a 16" x 17-3/4" x
5/16" thick piece of mild plate steel. Here's the
machine shop I went to, not the most inviting place
but they did the job quick. |
|
 Of course the metal adapter did not need to be of a
one-piece design like the wooden template. Excessive
and much too heavy.
Of course the metal adapter did not need to be of a
one-piece design like the wooden template. Excessive
and much too heavy. |
| |
|
|

 By using the wood template, I transferred the front
and rear bolt hole positions onto the steel plate.
By using the wood template, I transferred the front
and rear bolt hole positions onto the steel plate. |
|
 Next, I center punched the bolt hole locations.
 |
| |
|
|
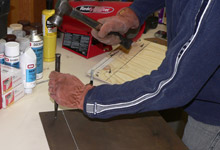
 Marks were designated to provide cut lines for the machine
shop. Although I was working with just one seat at the
time, I marked the plate for two sets of adapters.
Marks were designated to provide cut lines for the machine
shop. Although I was working with just one seat at the
time, I marked the plate for two sets of adapters. |
|
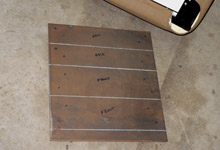
 I brought the plates back to the machine shop for cutting
and drilling. Once back in the garage, I checked them
against my wood template for accuracy.
I brought the plates back to the machine shop for cutting
and drilling. Once back in the garage, I checked them
against my wood template for accuracy. |
| |
|
|
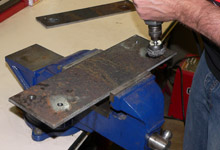
 The bolts required to attach the stock seat brackets
were prepped for a weld.
The bolts required to attach the stock seat brackets
were prepped for a weld. |
|
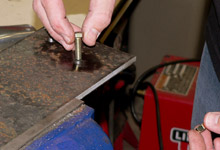
 I dropped two Grade 8 bolts per adapter through the
inboard holes.
I dropped two Grade 8 bolts per adapter through the
inboard holes. |
| |
|
|
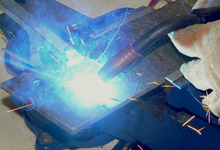
 Next, I gave each bolt a clean weld to the adapter.
 |
|
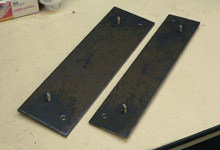
 Here is the unfinished but 100% functional product for
one seat.
Here is the unfinished but 100% functional product for
one seat. |
| |
|
|
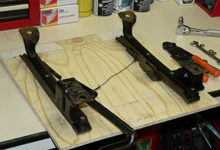
 Each adapter was fastened to the seat bottom.
 |
|
 The stock brackets fit perfectly to the adapters.
 |
| |
|
|
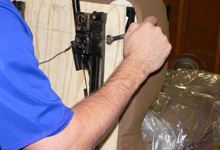
 The seat was attached to the floorboard.
 |
|
 Finally, I tested for smoothness of operation. To complete
the job, the adpaters should be removed, deburred and
painted prior to final installation.
Finally, I tested for smoothness of operation. To complete
the job, the adpaters should be removed, deburred and
painted prior to final installation. |


