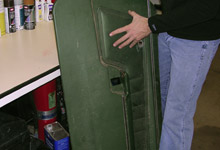
 I had already pulled the door panel inserts prior to
color coating with SEM.
I had already pulled the door panel inserts prior to
color coating with SEM. |
|
 Before trying to locate the right material to cover the
door panel inserts, I waited for the rear seat upholstery
to come in from Dearborn Classics so I could make a proper
color and texture match.
Before trying to locate the right material to cover the
door panel inserts, I waited for the rear seat upholstery
to come in from Dearborn Classics so I could make a proper
color and texture match. |
| |
|
|
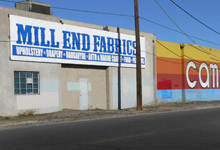
 Not every town will have a fabric shop like this one.
However, my home town (Reno, Nevada) has a good number
of specialty stores that are gold for DIY'ers like me.
Not every town will have a fabric shop like this one.
However, my home town (Reno, Nevada) has a good number
of specialty stores that are gold for DIY'ers like me.
|
|

 Mill End Fabrics had just the material I needed. One square
yard was only 15 bucks and the texture was a perfect match.
Mill End Fabrics had just the material I needed. One square
yard was only 15 bucks and the texture was a perfect match. |
| |
|
|
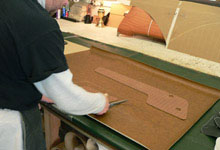
 Since I chose to re-use the original insert backing material,
I was
Since I chose to re-use the original insert backing material,
I was
careful to remove each staple retaining the original vinyl
very carefully. Once the staples were all removed, the
stock green vinyl came off easily. |
|
 Upholstery shops come in all shapes and sizes. I tend
to search for
Upholstery shops come in all shapes and sizes. I tend
to search for
smaller service providers when outsourcing a job. Most
big shops don't want to deal with a DIY'er who asks them
to take a job to 70% completion in exchange for a price
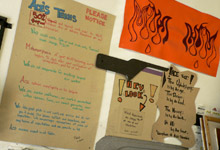
break. A local shop in my area, Ace's Upholstery, was
willing to work with me as long as I honored "Ace's
Terms". |
| |
|
|
 Troy from Ace's Upholstery cut me a deal since I supplied
the vinyl and was willing to take care of fastening the
finished upholstery.
Troy from Ace's Upholstery cut me a deal since I supplied
the vinyl and was willing to take care of fastening the
finished upholstery.
|
|
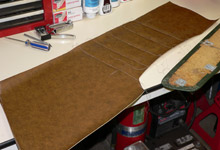
 For $30 a piece, this is what I came back to the garage
with to cover the door panel inserts.
For $30 a piece, this is what I came back to the garage
with to cover the door panel inserts.
|
| |
|
|
 This is a shot of the underside of the cover, the cardboard
shown here
This is a shot of the underside of the cover, the cardboard
shown here
provides something for the upholsterer to stitch the vinyl
to and is not used in place of the backing material.
|
|
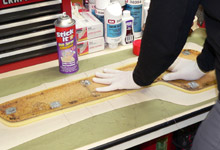
 With a specialized spray adhesive called "Stick It",
I attached the
With a specialized spray adhesive called "Stick It",
I attached the
re-used backing material to backside of the new cover.
|
| |
|
|

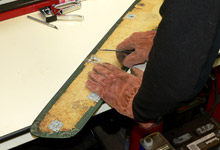
 The upholsterer used a generous amount of material so
I needed to trim it down before I could staple it down.
The upholsterer used a generous amount of material so
I needed to trim it down before I could staple it down. |
|
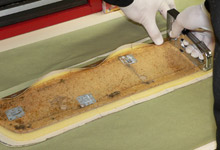
 Once trimmed, I pulled the material tight and stapled
it at various points around the perimeter of the backing
material.
Once trimmed, I pulled the material tight and stapled
it at various points around the perimeter of the backing
material. |
| |
|
|
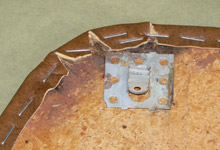
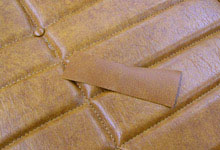
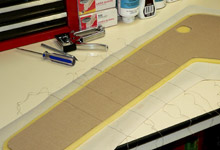
 The only tricky spot was around the corners. For my first
time doing this, I just took a look at how the factory
did it. By making small tirangular cut-outs I was able
to persuade the vinyl into making smooth turns.
The only tricky spot was around the corners. For my first
time doing this, I just took a look at how the factory
did it. By making small tirangular cut-outs I was able
to persuade the vinyl into making smooth turns.
|
|
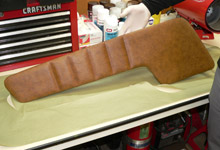
 After stapling and re-stapling a few times, the insert
was ready to be
After stapling and re-stapling a few times, the insert
was ready to be
mocked up in the Montego. |
| |
|
|

 Troy at Ace's Upholstery offered such a great rate and
quick turnaround that I had him cover the rear seat with
the upholstery I ordered from Dearborn Classics.
Troy at Ace's Upholstery offered such a great rate and
quick turnaround that I had him cover the rear seat with
the upholstery I ordered from Dearborn Classics. |
|
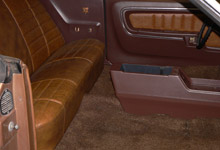
 Anxious to see how well my concept matched, I mocked-up
what I had completed so far. By attaching the insert,
gently hanging the panels, and sliding the rear seat in
place, I was able to catch a glimpse of the final interior.
The carpet shown here was also temporarily mocked-up.
Like the seat upholstery, I sourced the carpet from Dearborn
Classics.
Anxious to see how well my concept matched, I mocked-up
what I had completed so far. By attaching the insert,
gently hanging the panels, and sliding the rear seat in
place, I was able to catch a glimpse of the final interior.
The carpet shown here was also temporarily mocked-up.
Like the seat upholstery, I sourced the carpet from Dearborn
Classics. |
| |
|
|


