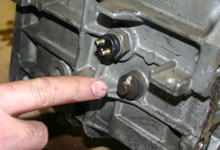
Start by removing the neutral saftey switch from the top
cover.
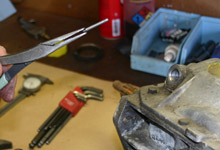
Using needle nose pliers, reach into the neutral switch
port and remove the activator pin. We're going to plug
this port since we have no plans to use a neutral safeguard
on the ignition switch.
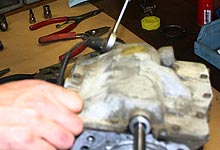
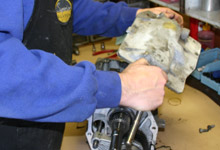
Remove the ten top-cover bolts using a 10mm socket.
Use the pry slots at the opposing corners of the case
to break loose the top cover. Do not try to lift or
force the cover off at this time.
Push the cover over to the drain plug side of the transmission
case to move the shift forks clear of the reverse mechanism,
allowing the cover to be lifted off the case.
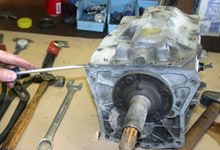
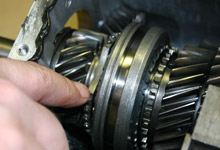
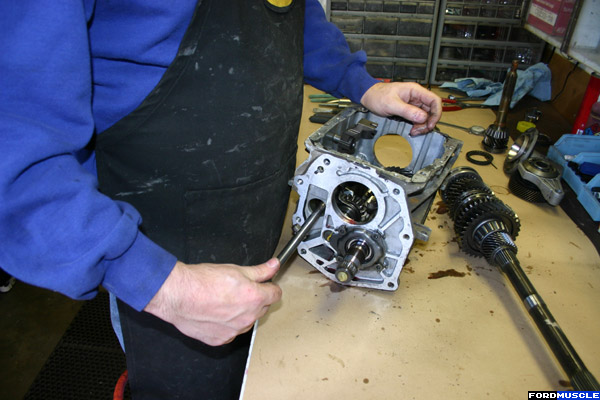
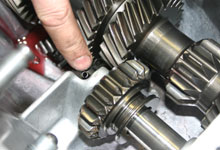
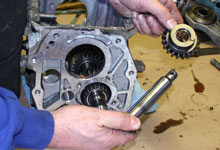
Turing to the back of the case, we'll work on removing
the 5th gear assembly. Using a drift punch, drive this
roll pin out of the 5th shift fork and shift rail.
Using snap ring pliers, remove the snap ring which secures
the 5th synchronizer assembly and 5th speed drive gear
in place.
The entire 5th gear shift fork and gear assembly can be
pulled off the cluster shaft and set aside.
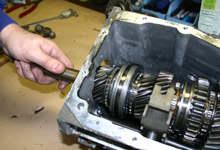
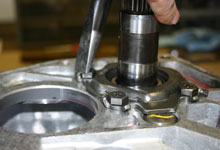
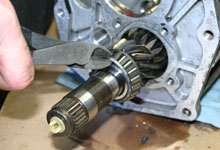
Back at the front of the case the bearing retainer is
removed to allow access to the input shaft. Note the shim
and bearing race which are behind the bearing retainer.
To remove the input shaft this crescent shaped notch needs
to face downward (shown in up position.)
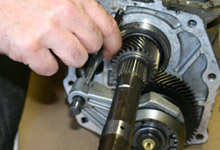
The input shaft can then be pull out. There will likely
be loose roller bearings which drop out. They can be discarded.
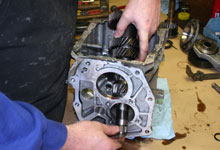
Slide the bearing cup off the main shaft.
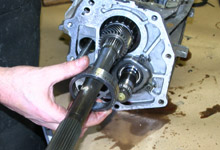
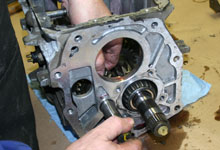
Carefully lift the output (main) shaft assembly up and
out through the top of the case and set aside.
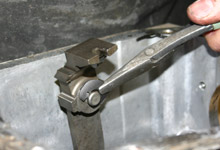
Reach into the case and unhook the spring from the 5th-Reverse
(5-R) shift rail assembly. Then pull the rail out of the
case.
Remove the retaining clip from the 5-R shift lever and
then remove the lever from the case.
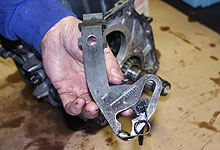
Shown is the 5-R shift lever assembly. Note the torsion
spring, this is found on mid 1992 and newer World Class
T5's.
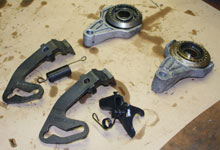
The 5-R shift levers and 5th shift forks from pre 1992
WC T5's (top) and post 1992 with the torsion spring (bottom)
cannot be interchanged. The early T5's use an extension
spring.
If the side of your T5 case has this pivot pin below the
back-up switch it indicates the later style 5-R shift
lever mechanism with the torsion spring.
Use a cold chisel to pry down the lock tabs on the bearing
retainer. Then remove the four T-40 Torx head screws.
The bearing retainer is removed along with the shims and
bearing race. On a standard rebuild we'd take note of
the shim stack height, but in the case of our G-Force
build up we'll check end play and shim accordingly for
the new gears.
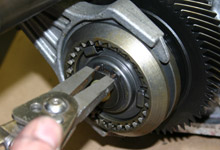
Next we'll remove the reverse idler shaft and gear. Use
a drift to punch out the roll pin in the idler shaft.
A fair warning, the shaft will want to turn as you smack
it so aim carefully.
With the roll pin out we can push the idler shaft out
the back of the T5 case.
The reverse idler gear can be removed as well. Be sure
to grab the O-ring which sits in front of the idler gear.
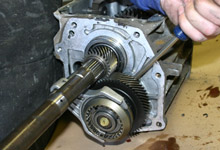
The final step to clear out the case assembly is removal
of the countershaft gear. Push the gear forward so the
shaft and cone bearing protrude out the rear of the case
as shown. Then snip the bearing cage to remove it from
the shaft.
With the bearing cage removed the countershaft gear assembly
can be guided out the top of the case.
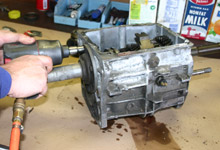
Finally, use a hammer to knock out the bearing cup out.
We'll replace this with a new piece.
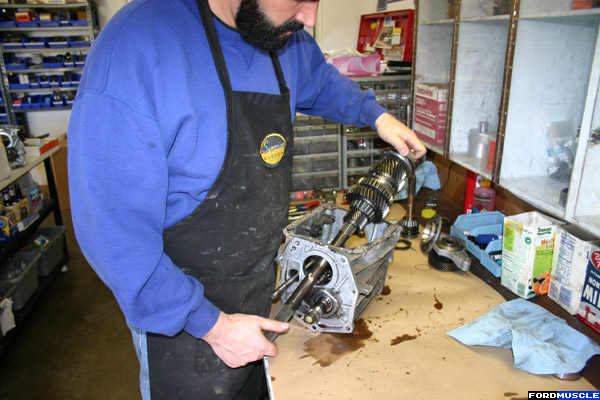
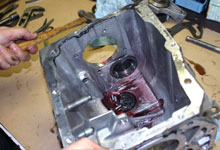
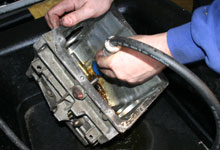
The empty T5 case can now be thoroughly cleaned with solvent.
Be sure to remove all metal debris stuck to the magnet
in the bottom of the case.