pix
FORDMUSCLE.com FordMuscle Nav
Page
3
 

Front Spring and Strut Installation (continued)

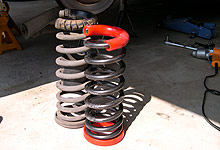
There are two methods to replacing late-model Mustang front springs. One is to disconnect the strut at the spindle and let the front of the a-arm swing down, allowing the spring to be uncompressed and pulled out. We've performed this method in the past and while it results in quick spring removal, it makes for a tough install because the new spring wants to jump out as the a-arm is jacked back into place. Welding a tab on the a-arm solves this problem, but not many have access to a welder. (See our article "How to Lower your Mustang" in the Suspension section of the Tech Department)

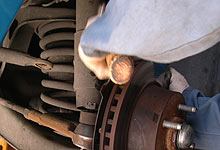
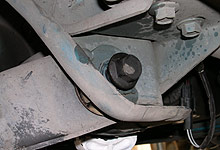
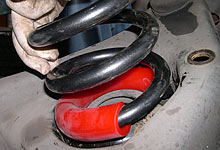
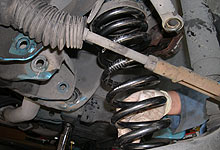
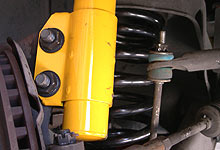
The other method, which we used for this article, is to remove the two a-arm to k-member attaching bolts. This allows the a-arm to drop down, still connected 
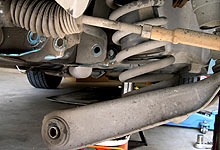
to the spindle and strut. The spring drops out harmlessly. 
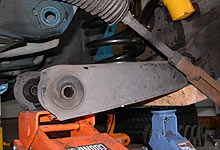
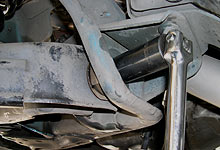
It takes two jacks to get the new spring and a-arm back into place, but the process is very manageable. We've outlined it here for you.


Remove the swaybar end links then disconnect the outer tie rods from the spindle. We do this by backing off the castellated nut, then smacking it with a heavy hammer.
 
Un-torque the large a-arm to frame (k-member) mounting bolts. Leave the bolts in for now and remove just the nuts (in board of the a-arm.) An impact wrench makes life easier here.
     

With both nuts removed, place a jack under the a-arm. You'll need to adjust the amount of load from the jack in order to take tension off the bolts, enabling them to be pulled or tapped out.
 
Once the bolts are removed, the jack can be lowered carefully, and the spring will drop out. There is little to no risk in this method of the spring still having tension when the arm is fully lowered.
     

A comparison of the stock and Eibach Pro-Kit springs. Note we are also replacing the rubber isolators with new Energy Suspension polyurethane pieces. The Eibach spring is about 3/4" shorter in height.
 
The "pig tail" end of the spring sits in the a-arm. Position the end of the spring between the two drain holes in the seat of the arm (not visible in this photo.)
     

With the spring seated between the a-arm and upper k-member seat, the jack is slid back under the inside edge of the control arm.
 
We've found that two jacks, one inboard and the other under the outer edge of the a-arm, keeps the spring and arm from walking outward, losing alignment with the bolt holes.
     

Once the a-arm is aligned with with the mounting holes in the k-member, slide the bolts into place and torque to 150 ft.lbs. The first side typically takes longest as you learn how to jack the arm up evenly.
 
Reconenct the tie rod, and move to the other side. It's best to wait on connecting the sway bar endlink until both sides are completed.


(Rear Spring and Shock Absorber Installation)
 
Page
3
 

pixblue
pixblue
Tech Archives Project Cars Readers Cars Feature Cars