Early Mustang Steering Box Upgrade
(cont.)
Our stock box was full of slop.
We measured a total of 3" of movement in the steering
wheel before the steering linkage would move.
With the new 16:1 ratio Flaming River box installed the
slightest input to the steering wheel results in movement
at the tires. Not to mention that the wheel is smooth
and tight throughout the entire range of movement. With
our manual steering you can actually make u-turns with
one hand on the wheel. Steering effort has truely decreased
dramatically. Not a bad investment for about $475. |
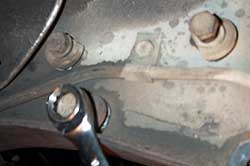
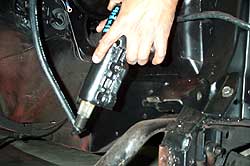
11. From the driver-side
wheel well remove the three steering box mounting nuts.
Be sure to place hand on the box when you get to the last
bolt, otherwise it will likely drop down on your skull. |
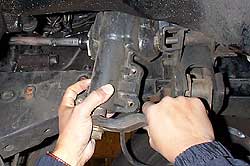
12. If the motor is in
the car the only way to remove the long-shaft box is
from under the car. You'll likely need the car on a
lift, or as high as possible on jack stands (be safe!)
You will also need to remove the motor mount on that
side, and possible jack the engine up a smidge. Without
the motor in the compartment, the box and shaft come
out from the top with ease.
|
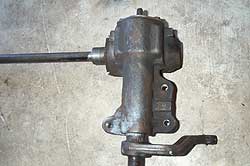
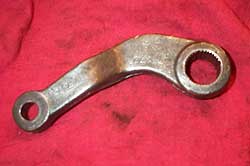
13. One 35 year old steering
box to go. Hang on to the old box...while it's not useful
to you, they are becoming rare and can be rebuilt or sold
to someone looking for a restoration correct piece. |
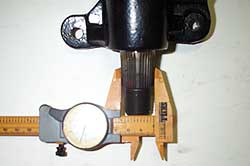
14. Early Mustangs use a
1" sector shaft, while the '67 and up Mustangs use
a 1-1/8" diameter shaft. Be sure to measure yours
before ordering. The new box for our '67 comes with a
16:1 steering ratio. Due to the roller bearing internals
the steering effort is decreased quite a bit. |
|
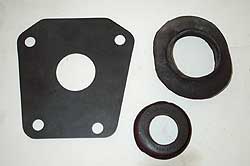
16. It's a good idea to
replace the column and firewall seals while the box
and shaft are out. Clockwise from left: firewall seal,
column seal, and column to shaft seal.
|
17. The new box goes in
the same way it came out. Don't worry about aligning the
shaft at this point. |
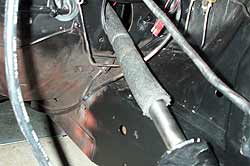
18. Again, be sure to wrap
the shaft in something soft to avoid dinging up the interior. |
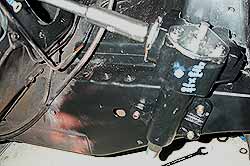
19. Secure the box to the
frame rail, reusing the original mounting bolts. Note
how the steering shaft diameter increases near the box.
This additional material serves as a vibration dampner. |
20. Slide
the new firewall seal down the shaft, followed by the
retainer. |
21. Replace the end seal
and slide the new colum down the shaft until it seats
against the end of the shaft. Secure the column to dash
bolts. |
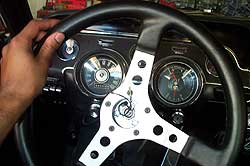
22. Temporarily attach the
steering wheel to the shaft. We're going to center the
box and steering linkage, which may require repositioning
the steering wheel. Count the number of turns the wheel
makes from lock to lock -our's is four revolutions. Crank
the wheel all the way to one side then turn back half
the number of total turns, so in our case two turns back.
This the center point. Reposition the steering wheel,
if neccesary, so the spokes are centered. |
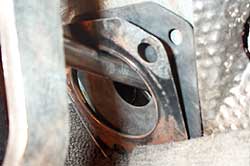
23. With the steering wheel
set at center the pitman arm can be reattached to the
sector shaft. We cleaned up the original pitman
arm (check the splines for damage and replace if neccesary.)
|

24. The blind splines on
the shaft allow the pitman arm to bolt on basically one
way, so dont worry about being off by one spline...it's
not possible. Make sure the bend in the arm swings up. |
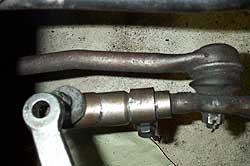
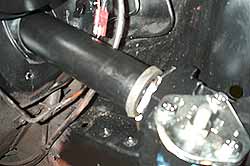
25. With the wheels pointed
forward the ball stud on the steering linkage should
be fairly close to lining up with the pitman arm. If
not you can probably find some adjustment in the centerlink.
We're using an adapter (Mustang Plus) which enables
the conversion of a power steering centerlink to function
as a manual centerlink.
|
Source:
FLAMING
RIVER INDUSTRIES, INC.
800 Poertner Dr.
Berea, Ohio. 44017
1-800-648-8022 |
|


