 |
 |
 |
 |
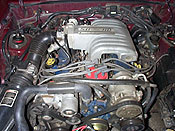
| The
bone stock '88 5.0 (mass air) has 130K miles, and has run
a best of 13.89@99.5
mph. The head and intake upgrade should land us in the mid-13's,
on radials. |
Late model cars have alot of electrical and vacuum connections,
which can make the job intimidating. We recommend taking some
pictures before disassembly, so you know where to put everything
back. |
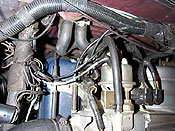
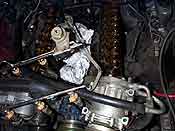
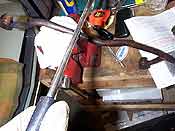
Removing
the heads requires draining the coolant and oil, and depressurizing
the fuel lines using the schrader valve located on the fuel
rail. We also disconnected the h-pipe from the headers. |
The
EGR coolant lines,throttle cable bracket, and a few vacuum
lines need to disconnected before the upper intake can be
lifted off. |
 |
 |
 |
 |
| With
the upper off, we've got access to the fuel rails and lower
intake. Remove the distributor before attempting to remove
the lower. |
We
didn't have the proper fuel line disconnect tools, so we simply
swung the fuel rail and injectors over to the side. We also
removed the AC compressor from its bracket and set it aside,
without disconnecting any of its hoses. |
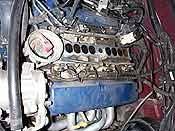
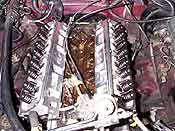
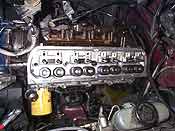
With
the lower intake off, the heads can be unbolted and lifted
off. |
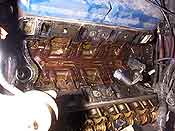
The
sludge and crud buildup is typical for a high-mileage motor
that has never been apart. This is good opportunity to clean
it all out. We even found remnants of a bee in one intake
port!
|
 |
 |
 |
 |
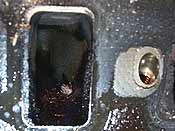
| The
most critical part of the whole process is cleaning the head
surface and intake valley. We used a shop vac to vacuum up
the coolant in the bores. Then using gasket remover and carb
cleaner, we methodically cleaned everything. |
About
two hours later, we've got a block surface so clean you could
eat off it. But then you'd have to clean it again...so don't!
As a final prep of the surface, wipe off any grease with paint
thinner or similar degreaser. |
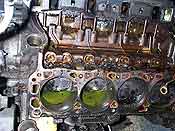
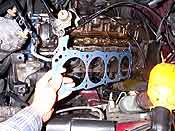
With
the locating dowels in place, the new head gaskets (Fel Pro
8548-PT2) are laid down, taking care that they are oriented
properly. Remember, small block Fords only have coolant passing
through the gasket at the rear of the block. Most gaskets
have "FRONT" stamped in them to remind you. |
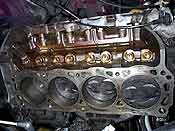
With
the gaskets down, the Holley heads are set in place. |
 |
 |
 |
 |
| It's
a good idea to use new ARP head bolts whenever replacing heads.
Use RTV sealer on the lower bolts since they pass through
water jackets. |
Always torque head bolts in sequence, beginning with the center
head bolts and alternating to the outer bolts. Torque in steps
(i.e. 30 lb.ft, 60 lb.ft, and 80 lb.ft.) |
Due
to the raised exhaust ports, the AIR holes in Holley head
are also .400" higher. Since this would cause a problem
with the accessory brackets, the systemax heads come with
another threaded hole in the stock location. To block the
AIR holes in the front of the heads you'll need a 5/8"
pipe thread plug, available at most hardware stores. The Ford
threaded bushings using in the stock heads will not work (shown
upper right.) |
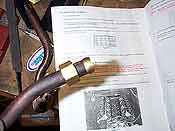
The
raised AIR holes requires that the AIR tube be lengthened
about 1". Holley instructs you to use a hacksaw to cut
the tube. |
 |
 |
 |
 |
| Then
use the included compression fittings to rejoin the two tubes.
The AIR tube is now the correct length and can be bolted to
the back of the heads. Holley however neglects to mention
the stock bolts to hold the tube to the heads will not work,
as they are too long. You'll need to go to the hardware store
with the bolt in hand and find one about 1/2" shorter
in the correct thread size. |
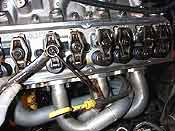
The
headers get bolted in place next. It's always a good idea
to use antiseize or Teflon tape whenever threading steel fasteners
into aluminum. |
We
had replaced the stock restrictive headers with Dynomax
shorties a while back. The 1 5/8" equal-length primaries
will be a perfect match for the well flowing Systemax exhaust
ports. |
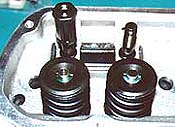
Rather
than use the stock pedestal mount rocker arms, we opted to
convert to the more reliable stud-mount rocker arms. To do
this we used Crane's pedestal to stud conversion kit (part
no. 26655-16). The kit simply bolts to the pedestal mounts
without requiring any machine work, and enables the use of
a standard 3/8" stud mount roller rockers. |
 |
 |
 |
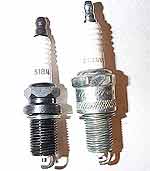
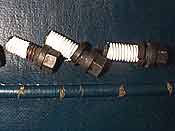
Holley recommends the Champion plug on the right. Unfortunately
the large 13/16" socket size on this plug interferes
with our header flanges. We opted to use the Autolite 5184
plug on the left, which has the same gasket seat, reach, and
heat range. |
| Installation
of the Crane conversion kit is very simple. Rather than a
conventional hardened steel guideplate, the kit uses a plastic
insert to guide the pushrod. This allows the use of the stock,
non-hardened pushrod. |
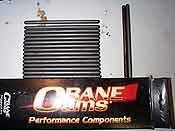
The
Holley heads require a slightly shorter pushrod than stock.
Holley recommends a 6.400" pushrod, however we measured
and deemed a 6.375" to be a perfect fit, and also a more
common size. We picked up Crane's 36623-16 for about $80.
|
The
1.6:1 roller tip rockers go on next. Setting lifter preload
with stud mount rockers is easier than than fussing with the
shims and torque settings for pedestal mount rockers. Simply
turn the hex nut until there is no play in the pushrod, then
give it another half-turn and snug down the allen lock. You
still need to make all preload adjustments with the lifter
on the base circle of the cam. |
 |
 |
EXPLORER
INTAKE INSTALLATION >>
|
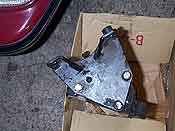
| Shown
here is the AC / PS bracket mounted on the stock head. For
whatever reason the bracket would not bolt up straight to
the Systemax head. We had to open up the holes to the next
drill size in order to solve the problem. |
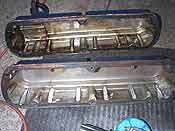
Another
headache with the Holley heads is the fact the stock '88-'92
valve covers do not fit. The reinforcement ribs along the
inside of the cover interferes with the valve springs. We
had to grind all these flat to get the covers to work. Aftermarket
valve covers will work, but require a spacer between the lower
an upper intake in order to clear the throttle linkage. |
|
|


