 We're using ARP main studs for added strength. Studs
are considerably stronger than bolts because they
are not "twisted" when torqued to spec.
Thread them in hand tight, do not torque the bare
stud down.
We're using ARP main studs for added strength. Studs
are considerably stronger than bolts because they
are not "twisted" when torqued to spec.
Thread them in hand tight, do not torque the bare
stud down. |
|
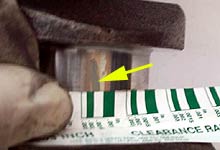
 Prior to installing the crank and main bearings,
we recommend checking main and rod bearing clearances.
Refer to our article Measuring
Bearing Clearances in the Fundamentals section
of the Tech Department.
Prior to installing the crank and main bearings,
we recommend checking main and rod bearing clearances.
Refer to our article Measuring
Bearing Clearances in the Fundamentals section
of the Tech Department. |
| |
|
|

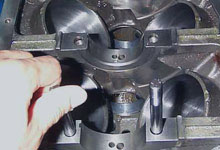
 Lay a bead of silicone sealer in the seats for the
rear main seal. Once this is done the crank can
be set down and torqued to specification. If you
are using studs, or ARP bolts, be sure to use their
torque ratings.
Lay a bead of silicone sealer in the seats for the
rear main seal. Once this is done the crank can
be set down and torqued to specification. If you
are using studs, or ARP bolts, be sure to use their
torque ratings. |
|
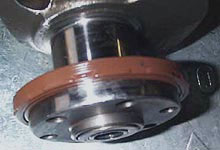
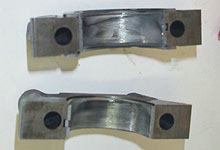
 On late-model 5.0L the rear main seal is one-piece.
Coat the seal with a little oil and then slip the
seal over the crank. The expander spring in the
seal faces towards the front of the block.
On late-model 5.0L the rear main seal is one-piece.
Coat the seal with a little oil and then slip the
seal over the crank. The expander spring in the
seal faces towards the front of the block. |
| |
|
|
 Place some moly on the crank side of the main bearings,
then carefully place the crank in place.
Place some moly on the crank side of the main bearings,
then carefully place the crank in place. |
|
 Load the main caps with their bearing shells, use
moly on the crank sides only.
Load the main caps with their bearing shells, use
moly on the crank sides only. |
| |
|
|
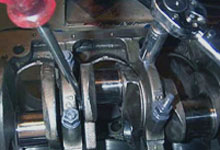
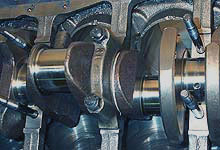
 After installing the main caps and torquing to specs
(we used the specs provided by ARP.) The next step
is to seat teh thrust bearing. Use a large screw
driver against the counterweights, and pry the crank
forward and backward a few times. Then torque the
thrust bearing cap with the crank leveraged forward
(towards the front of the engine.) It may seem like
the crank is going no where, but you can check for
thrust end-play, as described in the next frame...
After installing the main caps and torquing to specs
(we used the specs provided by ARP.) The next step
is to seat teh thrust bearing. Use a large screw
driver against the counterweights, and pry the crank
forward and backward a few times. Then torque the
thrust bearing cap with the crank leveraged forward
(towards the front of the engine.) It may seem like
the crank is going no where, but you can check for
thrust end-play, as described in the next frame... |
|
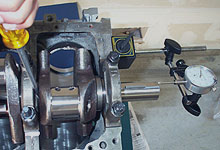
 With a dial indicator zeroed against the end of
the crank, and base secured to the block, pry the
crank back towards the direction of the flywheel
and note the total end-play. Then pry it forward
and note the endplay. Add the two values to obtain
total crank endplay. Acceptable values are between
.004-inch and .010-inch. If the endplay is not enough,
the thrust bearing flanges can be "lapped"
across sand paper to increase play. In the rare
case of too much clearance, you'll need to consult
with a machine shop, as the crank may be excessively
worn.
With a dial indicator zeroed against the end of
the crank, and base secured to the block, pry the
crank back towards the direction of the flywheel
and note the total end-play. Then pry it forward
and note the endplay. Add the two values to obtain
total crank endplay. Acceptable values are between
.004-inch and .010-inch. If the endplay is not enough,
the thrust bearing flanges can be "lapped"
across sand paper to increase play. In the rare
case of too much clearance, you'll need to consult
with a machine shop, as the crank may be excessively
worn. |


