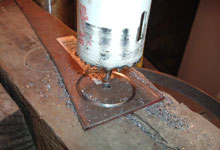
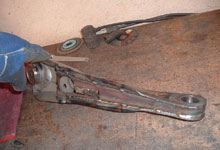
I use a 2" hole saw to cut the access to the sway
bar end-links once the arms are boxed closed.
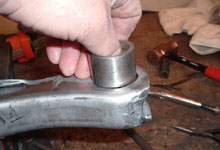
To remove the stock rubber bushing and inner sleeve I
use the tried and true technique of drilling many small
holes in the bushing until it falls apart.
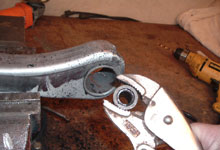
Use a set of vice grips or channel locks to grab a hold
of the inner sleeve and pull it out of the control arm.
The busing is bonded to the sleeve so it may take some
muscle power.
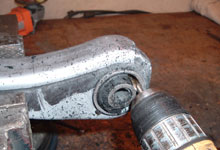
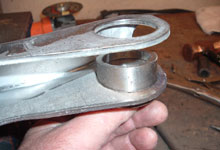
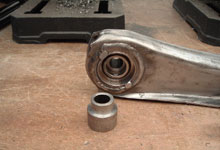
The outer bushing sleeve must also be removed from the
stock control arm. Use a punch to carefully fold in the
lip as shown here. The sleeve is pressed in so once the
lips are knocked over you can tap out the sleeve with
a hammer.
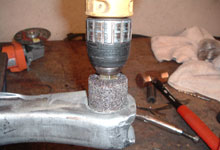
The new sleeve will not fit in the stock hole, it will
need to be opened up slightly.
I use a 1-1/2" (or 1-1/8" for 65-66 arms) diameter
grinding stone on a drill and slowly grind open the hole.
While grinding the bushing hole periodically check if
the sleeve fits. You want a light interference fit.
Once the sleeve is in place and held square I tack weld
the inside joints first, followed by welding the joints
on the outside of the arm.
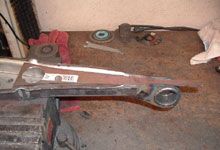
With the sleeve welded in place I begin work on boxing
the arm. The steel plate cut earlier is set into place.
The brace is purposely cut long so the end can wrap around
the contour of the control arm.
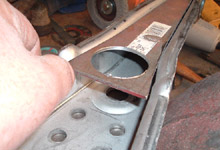
Notice how the access hole lines up over the existing
sway bar mounting hole in the arm. If you pull the brace
to far forward you'll cause interference with the strut
rod assembly.
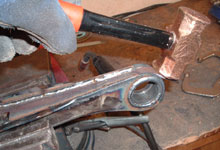
After tacking the brace to the arm I use a hammer to roll
the brace around the tail end radius of the arm.
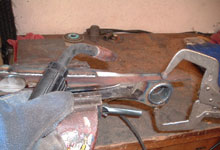
With the brace clamped as shown to ensure a tight joint
I finish up the welding.
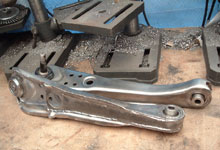
Here is the arm with the brace all welded in place. After
the bearing is installed the arm will get cleaned and
painted.
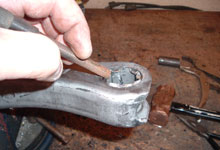
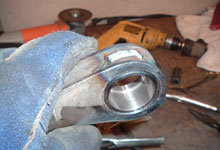
The bearing will slide in and stop up against the lip
machined into the sleeve. The retaining ring is then set
into place and tack welded as shown. Don't weld completely
around the ring as the bearing is a serviceable item and
replacement can be achieve by simply grinding the two
tack welds and removing the bearing. The two sleeves simply
position into place and are held against the bearing once
the arm is bolted into located.
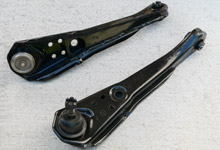
The arms are cleaned up and prepped for painting.
Several coats of gloss black makes the arms look stock.
For a more durable finish try powder-coating
at home.
Ball Joint Tech If your lower control arms are stock
originals now is the time to replace the ball joints. Generally
this means you are better off just buying new control arms. Moog
or Mcquay Norris control arms are $60-$80 each and use very high
quality pressed in ball joints. The cheap offshore reproduction
arms use cheap ball-joints either riveted or pressed into place,
and I recommend you stay away from those.
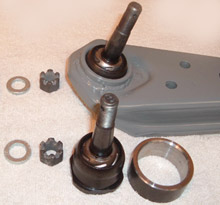
For maximum performance and serviceability I recommend screw in
ball joints. I use Afco ball-joint #20034
and #20043
threaded sleeve. The sleeve must be welded into your arms. I do
this modification on OpenTracker Racing Products track
series arms.