|
by Jon Mikelonis
Introduction
Stop calling your project a "Budget-Build" and quit
justifying your parts
gathering methods as "Resourceful". Stand up and
be counted, you're just cheap. That's right, cheap. The authorities
have been monitoring you and you've been caught scrounging
wrecking yards, slipping hardware into your tool bag, bumming
needle-nose pliers from fellow archaeologists, and purchasing
used junk that can be better had at the national chain store.
Now that you've been blindsided with the cold hard truth,
it's time you're held responsible for the cheap habits you've
been exhibiting in order to acquire those precious parts.
If you're wallowing in the revelation you just received, then
buck up bud because "cheap" is just a state-of-mind
and the dictionary has provided you with a way to confidently
brush off any future personal attacks. Attacks that target
your stingy nature in hands-on Ford restoration and modification.
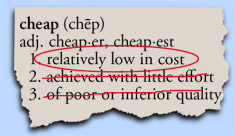 According
to the adjacent graphic, cheap can be defined three different
ways. Working from the bottom to the top, entry number three
doesn't apply to you because while you are price-conscious,
knowingly using "poor quality" or "inferior
parts" on your project car defeats the purpose of your
time and effort spent in this hobby. The next rung on the
ladder defines cheap as; According
to the adjacent graphic, cheap can be defined three different
ways. Working from the bottom to the top, entry number three
doesn't apply to you because while you are price-conscious,
knowingly using "poor quality" or "inferior
parts" on your project car defeats the purpose of your
time and effort spent in this hobby. The next rung on the
ladder defines cheap as;
"achieved with little effort". Spending half your
Saturday driving from
wrecking yard to wrecking yard in order to find the iron hulk
that possesses the brake rotor you need, which still requires
removal, does not exemplify "little effort". On
the other hand, if that brake rotor you need to pull is in
good condition and costs only $19.99, while the national retailer
is charging $149.00 for a new unit, then your effort just
met the first definition of cheap. So, if doing what it takes
to get parts that are "relatively low in cost" means
you've still got enough cash left over to take your wife or
girlfriend out for a nice dinner, then being called cheap
is something both you and the rest of us can live with.
"Cheap" Fixes
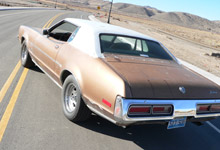
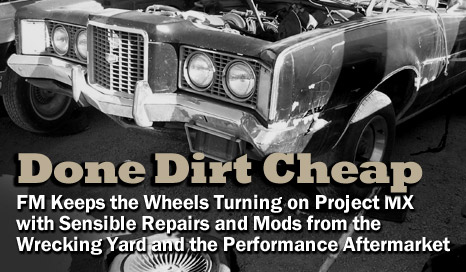
This past November marked the one-year mark since we picked
up Project MX in Fresno, CA. Since then we've made the 1972
Montego roadworthy and after this article we will have achieved
nearly all the objectives we set out to accomplish. Following
is a run down of our most recent progress on Project MX. To
accomplish these "budget-minded" fixes we practiced
much "resourcefulness". Forget about it... we were
just "cheap".
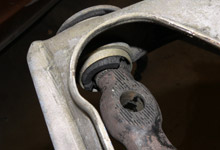
 Collapsed upper control arm bushings were making this
car unsafe. We chose not to drive the Montego until the
bushings were replaced with urethane. As usual, these
type of projects uncover more worn components.
Collapsed upper control arm bushings were making this
car unsafe. We chose not to drive the Montego until the
bushings were replaced with urethane. As usual, these
type of projects uncover more worn components.
|
|
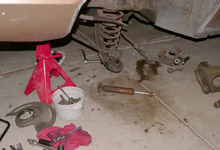
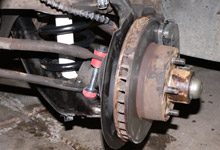
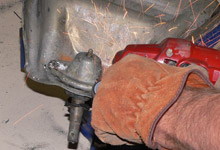
 Yes, that's a very original looking shock down there,
"Auto-Flex". At these moments it's tempting
to remove the entire front clip and embark on a complete
front-end restoration. We held back due to time and money
of course.
Yes, that's a very original looking shock down there,
"Auto-Flex". At these moments it's tempting
to remove the entire front clip and embark on a complete
front-end restoration. We held back due to time and money
of course. |
| |
|
|
|
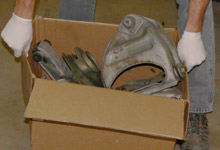
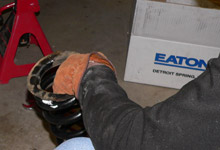
 Installing new ball joints and bushings into filthy
control arms is disheartening. We dropped both sets
of arms off at the machine shop for a wash.
Installing new ball joints and bushings into filthy
control arms is disheartening. We dropped both sets
of arms off at the machine shop for a wash.
|
|
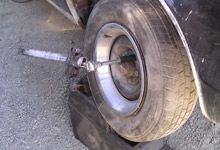
 Both rotors were worn beyond their limit. We found another
72 Montego at the local Pick N' Pull. Sure, www.partsamercia.com
and the local chain had them available but we couldn't
accept the price tag.
Both rotors were worn beyond their limit. We found another
72 Montego at the local Pick N' Pull. Sure, www.partsamercia.com
and the local chain had them available but we couldn't
accept the price tag. |
| |
|
|
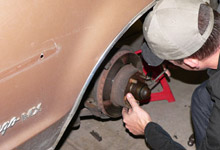
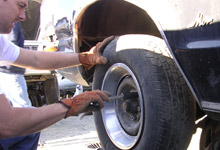
 Do you ever go to the wrecking yard actually expecting
to find what your are looking for? Why bring the tools
you need? We made a "cheap" breaker bar out
of a stock jack and braced the tire with a Chevy Van center
console.
Do you ever go to the wrecking yard actually expecting
to find what your are looking for? Why bring the tools
you need? We made a "cheap" breaker bar out
of a stock jack and braced the tire with a Chevy Van center
console.
|
|
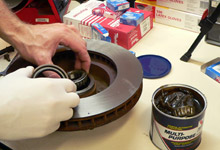
 These rotors were within limit so we had them turned at
our favorite independent general repair shop, Mike's
Auto Perfection in Reno, NV. When you find a local
shop that treats you right, do them a favor and keep going
back for jobs you can't do. We replaced the races, bearings,
and seals ourselves.
These rotors were within limit so we had them turned at
our favorite independent general repair shop, Mike's
Auto Perfection in Reno, NV. When you find a local
shop that treats you right, do them a favor and keep going
back for jobs you can't do. We replaced the races, bearings,
and seals ourselves. |
| |
|
|
|
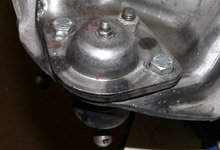
 Next, we attacked the upper ball joints with a high-speed
grinder by knocking off the large rivet heads.
Next, we attacked the upper ball joints with a high-speed
grinder by knocking off the large rivet heads.
|
|
 Standard replacement ball joints cost us a trip to the
chain store, that's OK because we got out of there for
next to nothing.
Standard replacement ball joints cost us a trip to the
chain store, that's OK because we got out of there for
next to nothing. |
|