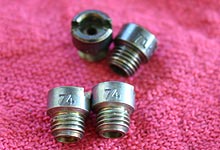
 The main body kit includes jets and recommending jetting.
We suggest simply bumping your primary and secondary jets
up three sizes as a safe baseline starting point. We originally
had 71 jets in the primary and stepped up to 74. Chance
are you'll end up very close or exactly at your previous
jetting, assuming you were tuned for optimal power to
begin with.
The main body kit includes jets and recommending jetting.
We suggest simply bumping your primary and secondary jets
up three sizes as a safe baseline starting point. We originally
had 71 jets in the primary and stepped up to 74. Chance
are you'll end up very close or exactly at your previous
jetting, assuming you were tuned for optimal power to
begin with.
|
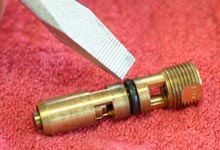
 On the secondary metering block we took the opportunity
to install jet extensions (the brass standoffs.) The purpose
of these extensions is to place the jet further into the
fuel bowl so that they do not become uncovered as the
fuel sloshed back in the bowl upon sudden acceleration,
which can result in a lean bog. We recommend these for
anyone drag racing a carbureted car.
On the secondary metering block we took the opportunity
to install jet extensions (the brass standoffs.) The purpose
of these extensions is to place the jet further into the
fuel bowl so that they do not become uncovered as the
fuel sloshed back in the bowl upon sudden acceleration,
which can result in a lean bog. We recommend these for
anyone drag racing a carbureted car. |
| |
|
|
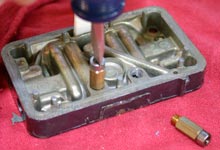
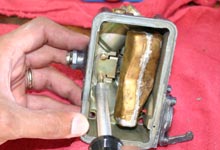
 Since this carburetor had been sitting on the shelf
for a couple years we changed out the power valve, as
the rubber diaphragm becomes brittle.
Since this carburetor had been sitting on the shelf
for a couple years we changed out the power valve, as
the rubber diaphragm becomes brittle.
|
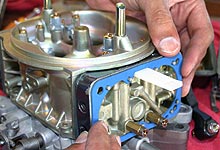
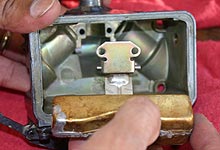
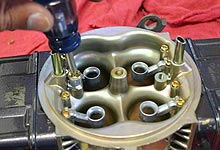
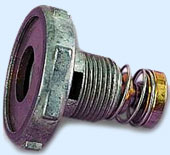
 The supplied nonstick gaskets are set on the metering
block. Pay attention to the self-locating holes.
The supplied nonstick gaskets are set on the metering
block. Pay attention to the self-locating holes. |
| |
|
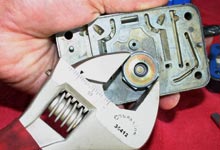
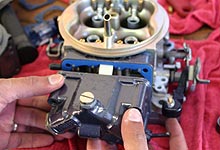
 A tip for those frequently performing jet changes with
the carburetor on the engine. File off some material above
the large vacuum port at the rear of the carburetor base
plate. This allows the secondary bowl and metering block
to be more easily removed.
A tip for those frequently performing jet changes with
the carburetor on the engine. File off some material above
the large vacuum port at the rear of the carburetor base
plate. This allows the secondary bowl and metering block
to be more easily removed. |
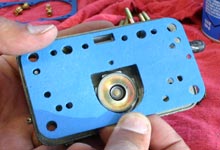
 Install the metering blocks on to the new main body.
 |
| |
|
|
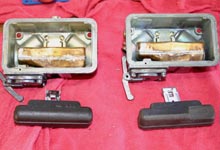
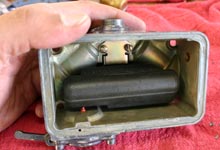
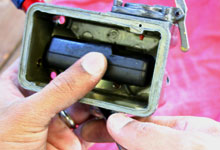
 Another worthwhile upgrade while your Holley is apart
is to replace the brass fuel level floats with these
Nitrophyl floats, available from Holley. The brass tends
to develop pinholes in the brazing, eventually filling
with fuel and poor fuel level control in the bowl.
Another worthwhile upgrade while your Holley is apart
is to replace the brass fuel level floats with these
Nitrophyl floats, available from Holley. The brass tends
to develop pinholes in the brazing, eventually filling
with fuel and poor fuel level control in the bowl.
|
 The needle and seat assembly also needs to be removed
to access the floats.
The needle and seat assembly also needs to be removed
to access the floats. |
| |
|
 Remove the two screws securing the float to the bowl.
 |
 Carefully pull the float straight out so as not to loose
the pin and tiny spring.
Carefully pull the float straight out so as not to loose
the pin and tiny spring. |
| |
|
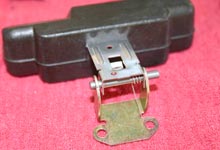
 The pin, spring and bracket must be transferred from the
old float to the new one as shown.
The pin, spring and bracket must be transferred from the
old float to the new one as shown. |
 You've transferred the mechanism correctly when the spring
tension forces the float to the bottom of the bowl as
shown here.
You've transferred the mechanism correctly when the spring
tension forces the float to the bottom of the bowl as
shown here. |
| |
|
 Carburetors that have been sitting dry for some time tend
to develop deteriorated needles and seat seals. If you
find fuel flows out of the vent tubes when you try to
start the engine, this is surely the case. Buy new replacements
at about $20 a pair.
Carburetors that have been sitting dry for some time tend
to develop deteriorated needles and seat seals. If you
find fuel flows out of the vent tubes when you try to
start the engine, this is surely the case. Buy new replacements
at about $20 a pair. |
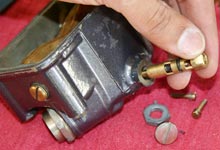
 When reinstalling the needle and seat assembly be sure
to use two gaskets, one between the adjustment nut and
bowl, and the other under the lock screw.
When reinstalling the needle and seat assembly be sure
to use two gaskets, one between the adjustment nut and
bowl, and the other under the lock screw. |
| |
|
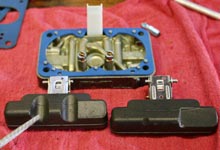
 If you are using jet extensions in the secondary metering
plate you'll need the notched version of the Nitrophyl
float (left). In a pinch you can file notches in a standard
Nitrophyl float.
If you are using jet extensions in the secondary metering
plate you'll need the notched version of the Nitrophyl
float (left). In a pinch you can file notches in a standard
Nitrophyl float. |
 Preset the float adjustment. Turn the bowl upside down
and let the float hang, it should should be at the bottom
of the sight hole in the bowl. Adjustments are made by
turning the needle-seat adjustment nut (clockwise to lower
the float and fuel level.)
Preset the float adjustment. Turn the bowl upside down
and let the float hang, it should should be at the bottom
of the sight hole in the bowl. Adjustments are made by
turning the needle-seat adjustment nut (clockwise to lower
the float and fuel level.) |
| |
|
 Finish up the installation by attaching the bowls and
metering blocks to the main body.
Finish up the installation by attaching the bowls and
metering blocks to the main body. |
 The ProForm comes pre-installed with primary and secondary
pump discharge nozzles. Unfortunately they are not marked
with a size (probably .028 in.) We ditched them for the
.035 in. which work best for us.
The ProForm comes pre-installed with primary and secondary
pump discharge nozzles. Unfortunately they are not marked
with a size (probably .028 in.) We ditched them for the
.035 in. which work best for us. |
| |
|
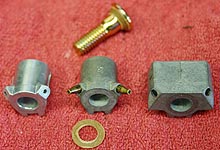
 Accelerator pump discharge nozzles are sized in thousandths
of an inch (stamped on the body.) The varying styles,
from left to right, standard, with discharge tube for
better flow direction, and anti-siphon. They all work
the same in our experience.
Accelerator pump discharge nozzles are sized in thousandths
of an inch (stamped on the body.) The varying styles,
from left to right, standard, with discharge tube for
better flow direction, and anti-siphon. They all work
the same in our experience. |
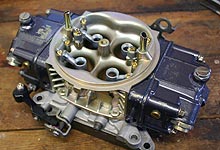
 There you have it, a fresh 650cfm double pumper. With
the new ProForm main body there is no hint this is a 1980's
era 4150.
There you have it, a fresh 650cfm double pumper. With
the new ProForm main body there is no hint this is a 1980's
era 4150.  |


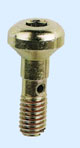 Moroso
offers this pump discharge nozzle screw. The radiused allen
head claims to offer less turbulence and the larger diameter
fuel slot is apparently repositioned to allow fuel a less
restrictive shot to the discharge nozzle. At $8 maybe it's
worth a try, though you'd be hard pressed to see any measurable
gains.
Moroso
offers this pump discharge nozzle screw. The radiused allen
head claims to offer less turbulence and the larger diameter
fuel slot is apparently repositioned to allow fuel a less
restrictive shot to the discharge nozzle. At $8 maybe it's
worth a try, though you'd be hard pressed to see any measurable
gains.