|
Background on Ford Alternators
Ford V8's have been equipped with a number of different charging
systems over the years. If you have an early 60's Ford, you
may still be running a generator with an external voltage
regulator. Generators are suitable if you are looking to restore
an old Ford back to stock. Unfortunately, generators tend
to be bulky in comparison to alternators and generally do
not charge well at low RPM.
In the mid 60's Ford introduced the Autolite alternator which
also used an external voltage regulator. This is effectively
what is known as the 1st generation (1G) Ford alternator.
The same unit found stock on our 1973 Torino. Until the 70's,
Autolite alternators were of three basic types: 38, 42, and
55 amp units. In the 70's Ford increased the power to 60 amps.
In 1972 the Autolite became the Motorcraft alternator. Due
to the massive rebuild market, Autolite and Motorcraft cases
have become intermixed, which means the name cast into a particular
stock alternator is not important.
Up until about 1985 Ford used 60 amp alternators with external
voltage regulators. Beginning in 1986, Ford introduced the
70 amp internally regulated alternator in cars with abundant
accessories and in most SEFI applications. This became known
as the 2nd Generation (2G) Ford alternator. The demarcation
was clearly due to the fact that the external regulator and
wiring was finally gone. Internally regulated or not, the
2G was still only producing 5 to 10 amps more than the 1G
alternator. In the 90's Ford began producing the 3rd generation
(3G) alternator in 95 and 130 amp versions. This is the alternator
type for which PA Performance bases their units. Keep in mind,
PA Perforamnce is not a rebuilder. For more information on
what makes a PA Performance 3G alternator different from the
one you could grab from a 90's Lincoln, be sure to read the
FM original technical article Keeping
Current.
PA Performance 3G Alternator and Accessories for Early
Ford
PA Performance offers small case and large case 3G alternators.
The 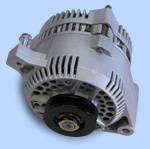 small
case unit is available in 95 amp and 150 amp versions. Most
early Fords run the small case alternator. The large case
unit is available in a 130 amp and 200 amp versions. We chose
the 95 amp small case unit since we had minimal power accessories
and our Torino was already equipped with the small cased stock
alternator. Considering we didn't even have a functional radio,
anything over 95 amp would simply be overkill. We simply wanted
the benefit of a dependable, low RPM charge. The 95 amp 3G
was sure to provide that. small
case unit is available in 95 amp and 150 amp versions. Most
early Fords run the small case alternator. The large case
unit is available in a 130 amp and 200 amp versions. We chose
the 95 amp small case unit since we had minimal power accessories
and our Torino was already equipped with the small cased stock
alternator. Considering we didn't even have a functional radio,
anything over 95 amp would simply be overkill. We simply wanted
the benefit of a dependable, low RPM charge. The 95 amp 3G
was sure to provide that.
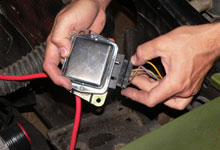
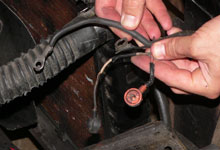
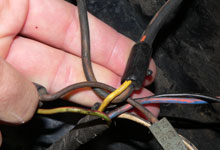
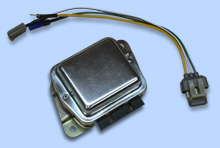 In
order to maintain your stock external voltage regulator's
wiring harness, PA Performance includes a "Plug and Play"
kit. Well? Almost... the install still requires a bit of stripping
and crimping. Just a reminder, the kit is made specifically
for the installation of the 3G alternator on any Ford vehicle
where the stock alternator is externally regulated. The box
shown here is a replacement for the existing voltage regulator.
The regulator replacement is designed to capture the proper
circuit and retain the stock wiring harness. The kit also
includes PA's own 3-wire regulator plug for use on the 3G
alternator and allows you to retain the OEM warning lights.
Let's cover one more required accessory and then we'll demonstrate
the simplicity of the alternator install. In
order to maintain your stock external voltage regulator's
wiring harness, PA Performance includes a "Plug and Play"
kit. Well? Almost... the install still requires a bit of stripping
and crimping. Just a reminder, the kit is made specifically
for the installation of the 3G alternator on any Ford vehicle
where the stock alternator is externally regulated. The box
shown here is a replacement for the existing voltage regulator.
The regulator replacement is designed to capture the proper
circuit and retain the stock wiring harness. The kit also
includes PA's own 3-wire regulator plug for use on the 3G
alternator and allows you to retain the OEM warning lights.
Let's cover one more required accessory and then we'll demonstrate
the simplicity of the alternator install.
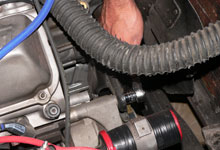
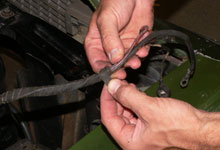
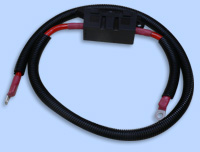 The
OEM main power wire running from the starter solenoid to the
alternator isn't suitable for the increased amperage of a
3G alternator. The wire shown here is meant to replace the
old wire. The wires are available in multiple lengths. Since
most early Fords have the starter solenoid and alterantor
on the same side of the vehicle the shorter wire is just right. The
OEM main power wire running from the starter solenoid to the
alternator isn't suitable for the increased amperage of a
3G alternator. The wire shown here is meant to replace the
old wire. The wires are available in multiple lengths. Since
most early Fords have the starter solenoid and alterantor
on the same side of the vehicle the shorter wire is just right.
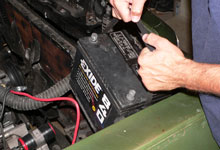
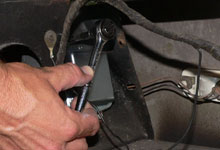
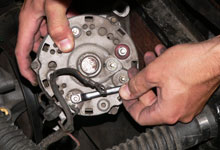
Alternator Installation
|