Maximum
Motorsports Caster Camber Plate Installation
(continued)
|
1.
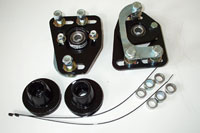
The MM kit for 87-93 Mustangs. The kit includes everything necessary
for installation, including the new bumpstops. Expect 4 hours
or so for the install, no special tools are necessary.
|

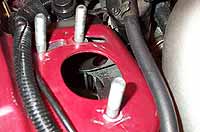
2. Stock 1988 Mustang caster/camber plates. Note that 89 and
up Mustangs used a revised plate which was not as bulky and
made it easier to install a strut tower brace. |
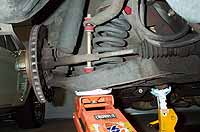
3. Step one is to jack the car up and support the front end
with jack stands under the k-member. Then place the jack under
the control arm and jack up slightly to compress the spring
and strut. |
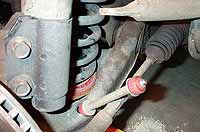
4. With the car supported on stands, disconnect the sway bar
endlinks. This will enable the lower control arm and strut to
drop down a much as possible. |
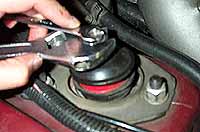
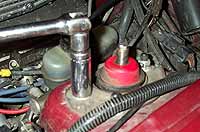
5. With the car supported on stands, use a air ratchet to zip
off the upper strut mounting nut. If you don't have air tools
you can use a couple of wrenches. Most struts have either a
flat section or a groove that enables you to old the strut rod
stationary while removing the nut.
|

6. With the nut removed, slide off the factory cap and strut
bushing. Notice we had upgraded to a polyurethane bushing. These
will not be used with the caster camber plates. |
7. Remove the three 5/8" nuts holding the strut mounting
plate to the shock tower. |
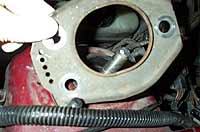
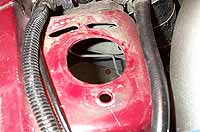
8. With the nuts off the stock plate can be removed. There may
be a factory installed rivet securing the plate to the strut
tower. If so you can punch or drill it out. |
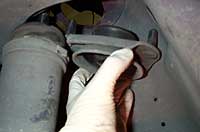
9. From under the strut tower, you'll need to wrestle the lower
mounting plate out. The strut will need to compressed slightly
to get the plate over the rod, so if you don't have a helper
prepare for some cursing and arm strength. |
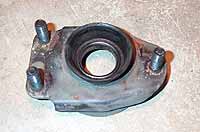
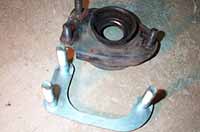
10. Here's the stock lower strut mount.
|
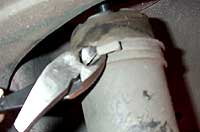
11. Use a set of pliers to cut the dust boot to bumpstop retaining
clip. |

12. The factory bump stop and cover will be removed and replaced
with a new polyurethane MM bumpstop. This step is NOT optional,
the factory bumpstop will not work properly with the MM plates.
|
13. Slip on the new bumpstop. Use a little spray silicone to
make it easier. Leave the stock dust boot disconnected for now.
We'll secure it to the bumpstop with a zip tie once the plates
are installed. |
14. With the stock strut plate and parts removed we're ready
to install the MM hardware. |
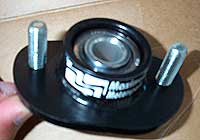
15. In the foreground is the new MM lower mounting plate. |
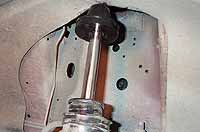
16. Install the new MM lower plate with the studs sticking through
the top of the strut tower. |

17. Layout the left and right upper plates. The plates are not
mirror images! We goofed during the install and had to go back
and swap the plates. |
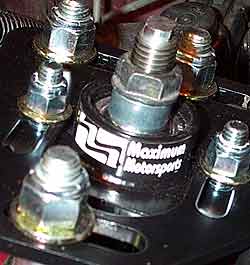
18. Install the spherical bearing assembly to the upper plates
using the nuts and washers provided. |

19.
Here's a shot of another set of MM plates, laid out nicely by
Sevek Arroyo, which shows the correct orientation and placement
of spacers. Full
View |

20.
Jack up the lower control arm to the bring the strut rod back
through the hole in the strut tower. Install the supplied
washers and spacers over each stud. Note the spacers go on
top of the washers!
|
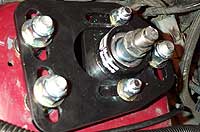
21. Install the plates on top of the spacers. Use the supplied
washers and nylock nuts. Do not secure or torque them down at
this time! |
|
 22.
The final step is to determine how many spacers (see pic. 19)
to place below and above the spherical bearing. Typically, with
a factory replacement strut, you will use one short spacer above
the spherical bearing (under the strut nut as shown) and a short
and tall below (i.e. slide them on to the strut rod before putting
the spherical bearing and plate assembly on. 22.
The final step is to determine how many spacers (see pic. 19)
to place below and above the spherical bearing. Typically, with
a factory replacement strut, you will use one short spacer above
the spherical bearing (under the strut nut as shown) and a short
and tall below (i.e. slide them on to the strut rod before putting
the spherical bearing and plate assembly on.
If the strut rod interferes with the hood when closed, you will
need to change the number of spacers below the bearing. (If
the strut rod does not fully come up through the bearing, then
you would need to remove a spacer from below the bearing.)
To determine the correct spacers above and below, first set
it up as described, a short and tall spacer below and one short
above. Use a piece of clay on top of the strut rod and gently
close the hood fully, with the car on the ground! The
strut must be fully loaded in order to determine proper clearance.
Open the hood and determine whether their is sufficient clearance
(thickness of the compressed clay.) If the rod hits the hood
you can place all three spacers below the rod, or buy additional
spacers from a hardware store. |
 Alignment Alignment
After installation of the caster camber plates, be sure to immediately
take the car to the alignment shop. Keep in mind most chain
tire and alignment shops may not align the car beyond the factory
specifications, for liability and tire wear reasons. So if you
want max negative camber and positive caster, for track use,
you will need to find a custom alignment shop.
We took our car to a local tire shop which uses a precision
laser alignment machine. The table below shows the alignment
before the plates were installed, which is the best the shop
could get it in order to minimize tire wear and keep the car
headed straight. Note the slight negative caster on the right
side, the side which had the out of whack k-member mounts. After
the caster camber plates the shop was able to get us near the
max caster allowed by the shop specs (the MM plates will actually
allow nearly 5 degrees of caster.) The car now drives straight
as an arrow, and carves corners like it were on rails! F/M |
Alignment
Results, before and after MM Caster Camber Plates
1988 Mustang LX 5.0 |
|
Before
|
After
(with CC plates)
|
Specified
|
|
Left
|
Right
|
Left
|
Right
|
|
|
| Camber |
-0.3°
|
0.2°
|
-0.3°
|
-0.2°
|
-0.6°
- +0.9°
|
| Caster |
0.7°
|
-0.1°*
|
1.7°
|
1.8°
|
0.5°
- 2.0°
|
| Toe |
0.04"
|
0.04"
|
0.08"
|
0.08"
|
0.03"
- 0.16"
|
| *Note
the negative caster on the right front wheel before the
caster-camber plates. This was due to the k-member being
slightly off center in the mounting holes from when we
hit the curb. With the cc plates the caster was set to
nearly the max of the specified range. |
|
|
|


