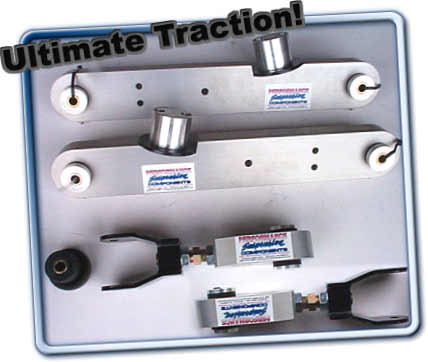
Performance
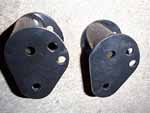
Suspension Lower and Upper Control Arms.
(Part# MCA0003 and MUA0003)
These
pieces are truely awesome in design and
construction!
CNC machined from super-strong 6061-T6511
billet aluminum. This design is nearly
four times stronger than stock, and significantly
stronger than welded tubular arms! The
poly bushings are greasable, and the arms
come pre-drilled for zerk fittings.
The lowers can be bolted in directly,
or using the supplied I.C.M. brackets
to adjust "anti-squat" characteristics.
The upper arms are fully adjustable, allowing
for setting of pinion angle.
|
| Installation
- Lower Arms |
 |
 |
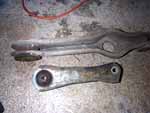
| 1.
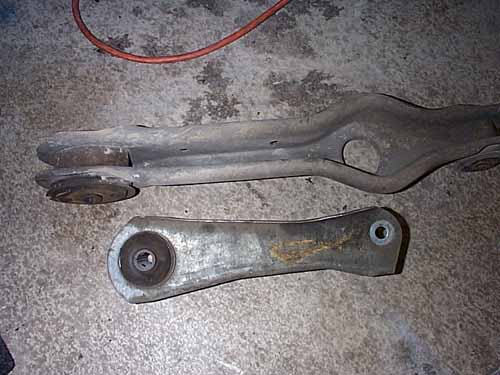
The stock control arms
are weak in design. The stamped steel design and
large rubber bushings flex and distort under stress. |
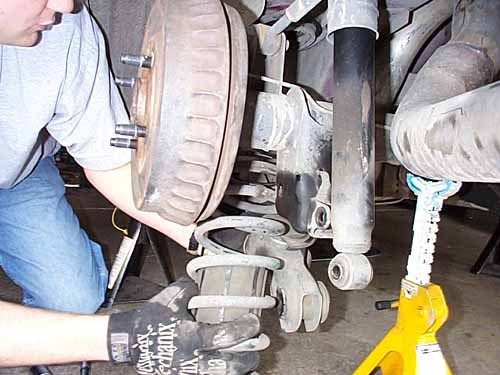
2.
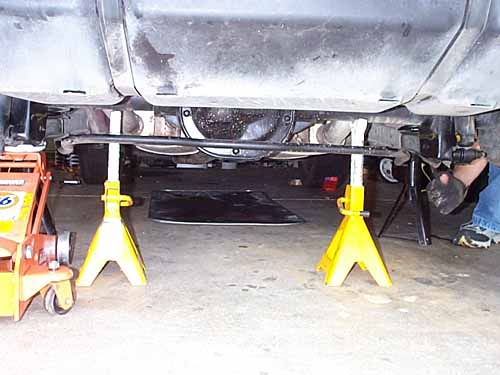
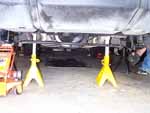
Start by jacking up the
car and placing jack stands under the frame, as
well as under the axle housing. Remove the wheels. |
 |
 |
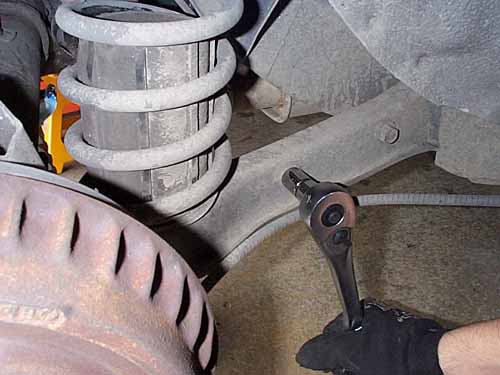
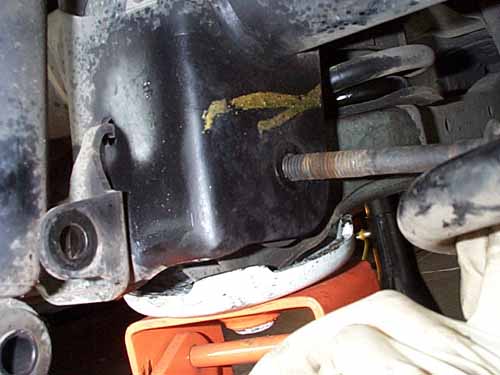
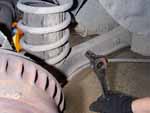
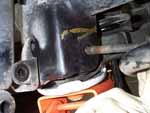
| 3.Drop
the sway bar by removing the bolts at the lower
control arms. |
4.
Remove the lower shock
bolt. Note: It's best to work on one side at a
time. Swap out the lower on one side, then move
on to the next. Once the lowers are installed,
move on to the uppers. |
 |
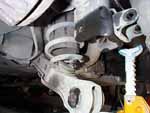 |
| 5.Place
a jack under lower control arm and axle bracket
and remove the rear control arm bolt. |
6.
Lower the jack slowly, until
the spring is fully extended. |
 |
 |
| 7.
The spring can now be removed
without any special compressors. |
8.
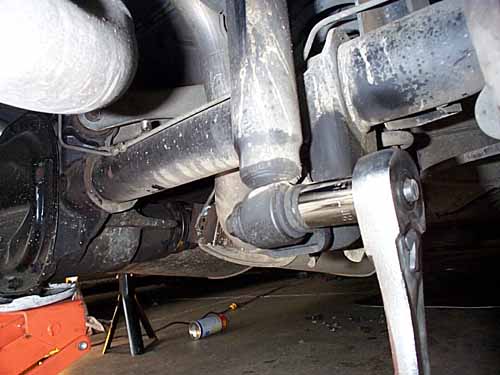
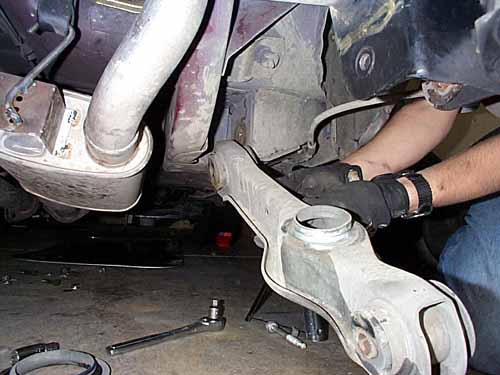
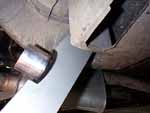
Remove the front control
arm mounting bolt, and the arms is ready to come
out. We had to temporarily disconnect the muffler
from the h-pipe to gain access to the bolt, which
is recessed in the frame. |
 |
 |
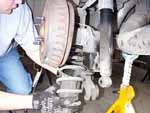
| 9.
Position the new arm at
the front mounting position, and secure the bolt
and nut. |
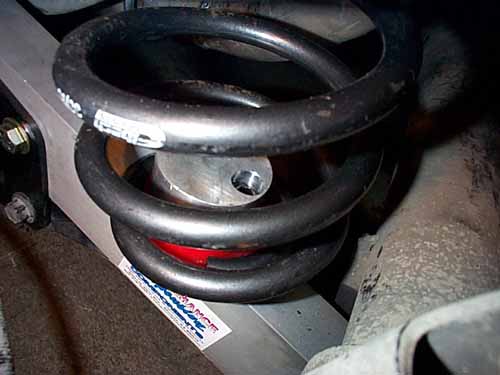
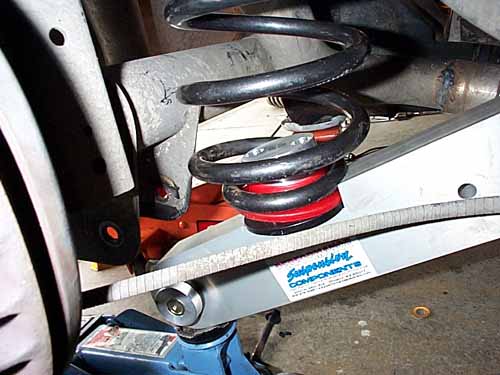
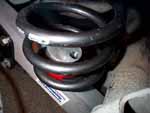
10.
Place the spring and isolators
on the arm. Note that there is up to a 5/8"
difference in ride height, depending on where
you "clock" the end of the spring coil.
We set ours at the rear of the arm for maximum
drop. Set both sides the same. |
 |
 |
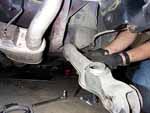
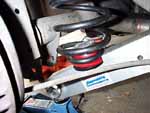
| 11.
Jack up the end of the lower
control arm until the bushing lines up with the
holes in the axle bracket. Secure the bolt and
nut. |
12.
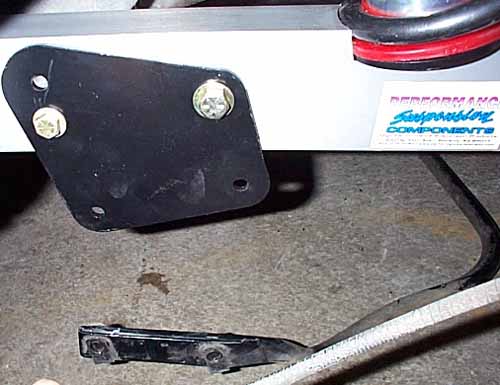
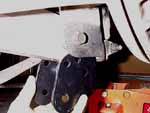
With the lower arms bolted in place, attach the
supplied sway bar brackets. The bracket come predrilled
in several spots to angle the sway bar in multiple
positions, depending on ground clearance.
|
 |
 |
| 13.
Reconnect the sway bar using
the stock bolts and nut-clips. |
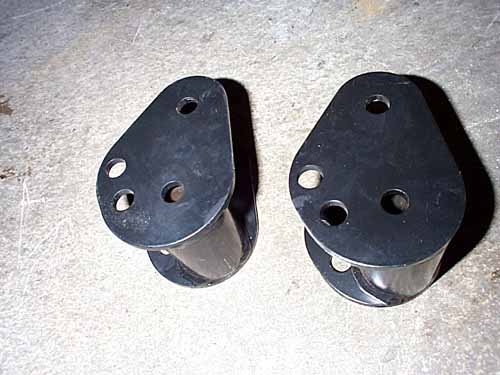
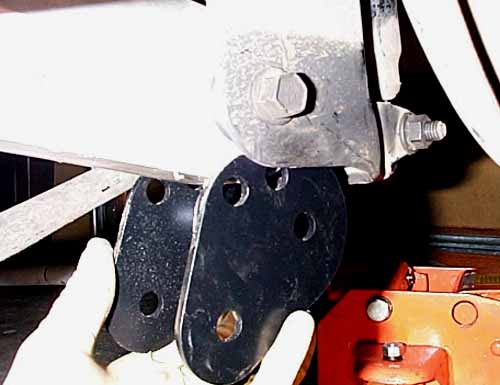
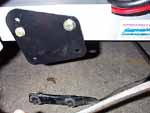
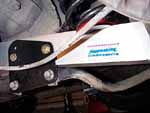
14.The
Performance Suspension lowers can be installed
directly, as we did, or with these ICM ("Instant
Center Modification") brackets, also included
with the kit. |
 15.The
brackets are bolted or welded to the axle bracket,
and allow for adjusting the "center of gravity
height". As a vehicle accelerates the rear
of the car tends to "squat" on the springs.
Changing the geometry of the rear suspension increases
"anti-squat", resulting in a transfer
of torque to the tires, which 15.The
brackets are bolted or welded to the axle bracket,
and allow for adjusting the "center of gravity
height". As a vehicle accelerates the rear
of the car tends to "squat" on the springs.
Changing the geometry of the rear suspension increases
"anti-squat", resulting in a transfer
of torque to the tires, which
otherwise would be absorbed by the springs. |
|
|
|
A few months ago we picked up a clean 1988 LX Mustang for
use as a daily driver. The 104,000 mile engine runs strong,
makes good compression, and doesn't burn much oil. The transmission
is an AOD, which will get a shift kit next month, but will
eventually get yanked for a T5.
Recently we started to think about the direction we want to
go with this car. Currently it serves as a guniea pig for
most of the late-model tech articles we put together. We've
upgraded the exhaust, installed underdrive pulleys, tore our
the air silencer, and added 3.55 gears. We didn't really want
to make it into another drag racer, mainly because there are
too many 5.0's already at the track! Besides we already got
a dedicated quarter miler in Project 11.99. So
after some brainstorming, and some of your suggestions, we
decided to set up the car for all around peformance driving.
We naturally want blazing straightaway speed, but just as
important will be the ability for handling and aggressive
cornering. In fact our plans are to focus on local autocross,
and possibly even open track events. Don't get us wrong, we
will definately run the car in the quarter from time to time,
but going in a straight line wont be the primary objective
of this project.
One of the first areas we wanted to tackle was the sloppy
rear suspension. With the abundant low-end torque of the 5.0
engines, it doesn't take much to break the rear wheels free.
Whether its straight line acceleration, or hitting it coming
out of a turn, the stock rear suspension offers up zero confidence.
A little bit of oversteer is nice to have, but to have the
rear slide out uncontrollably through a 30 mph turn is unacceptable.
A major area of weakness on the late model (Fox and SN95 platforms)
are the factory control arms. The thin stamped steel arms
offer no lateral stability, and combined with the large rubber
bushings, the arms undergo considerable flexing. Under hard
acceleration the stock arms and bushings sucuumb to wheelspin
and wheel hop.
We turned to Performance
Suspension Components to help us select a set of upper
and lower control arms which would offer the rearend stability
we were after. They suggested their billet aluminum, fully
adjustable, uppers and lowers. We spent half-a-day installing
the arms, and the other half in sheer awe at how well they
work!
MORE>>
|